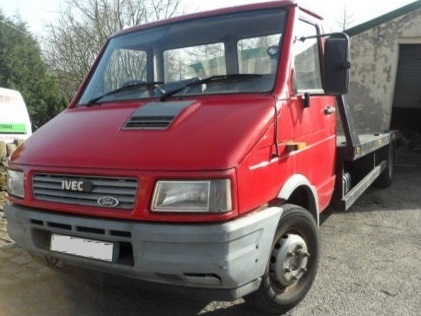
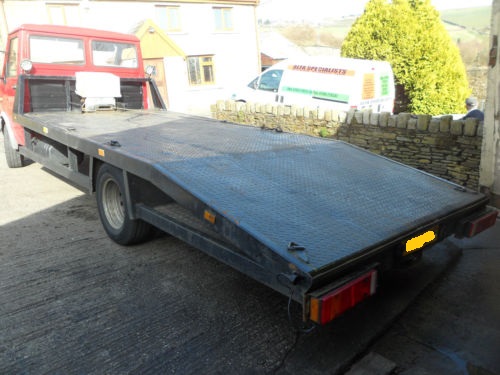
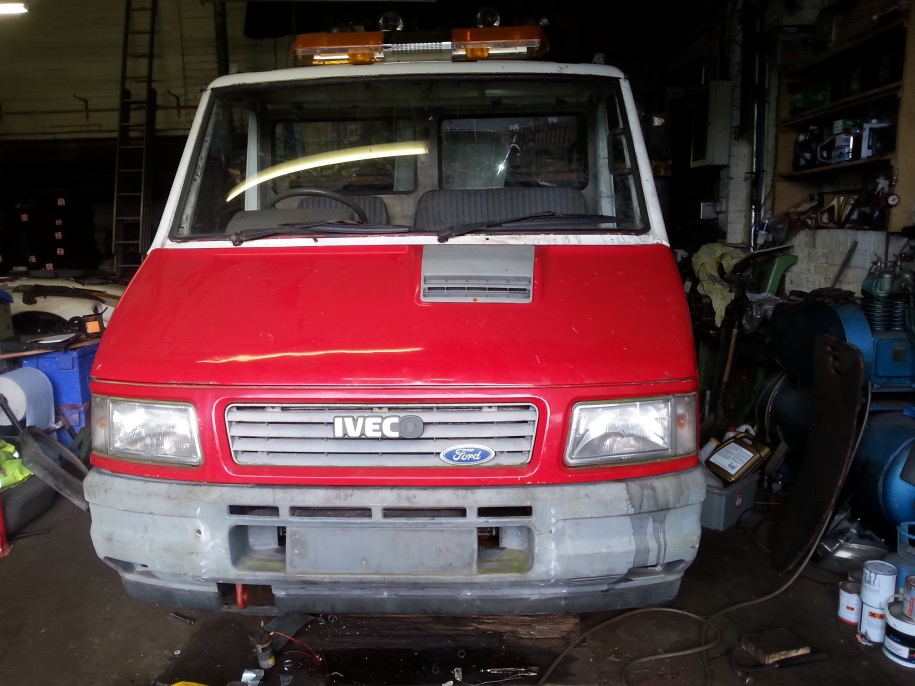
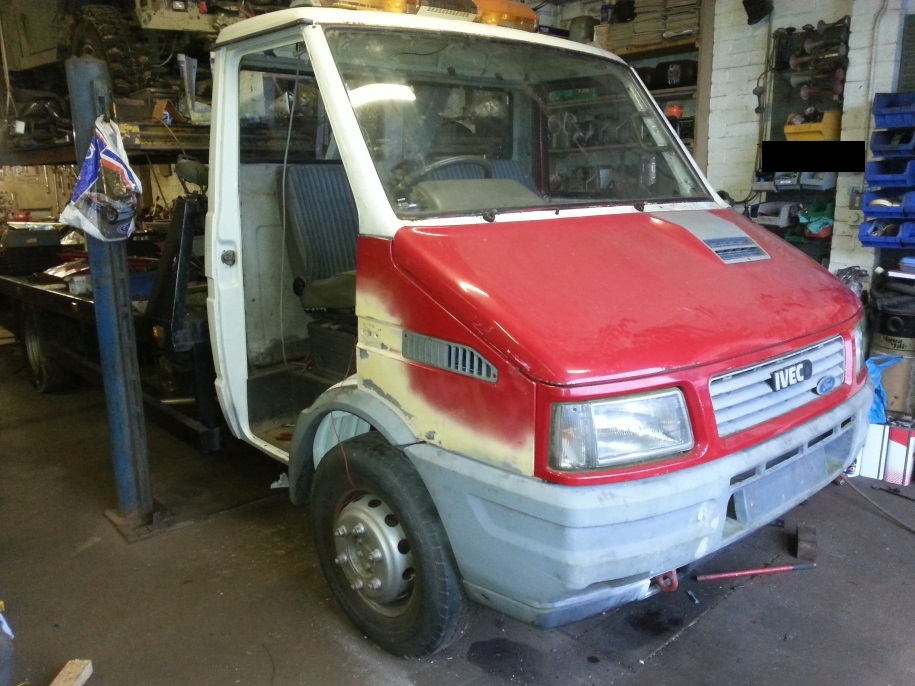
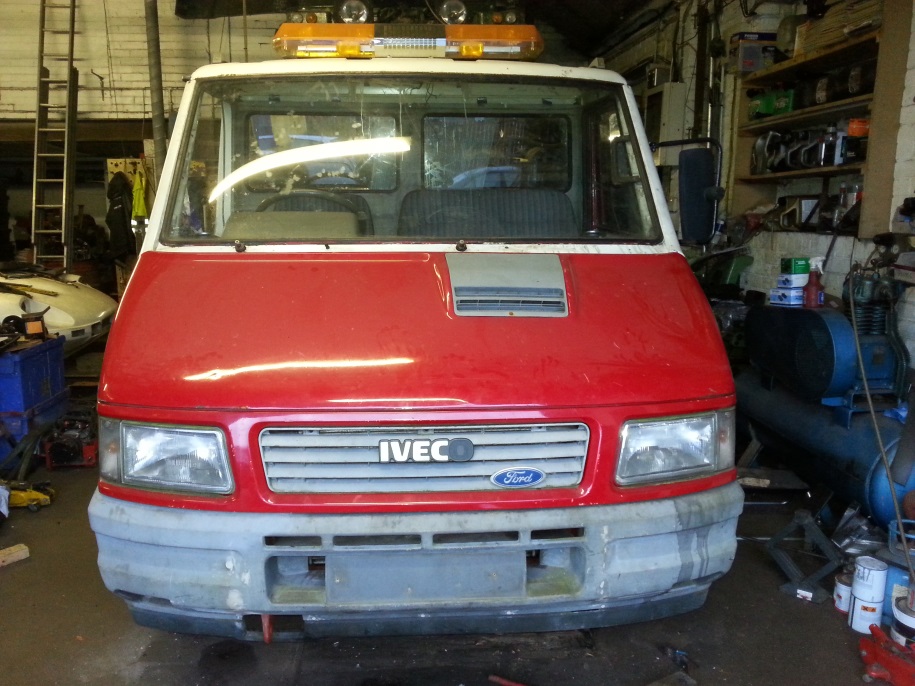
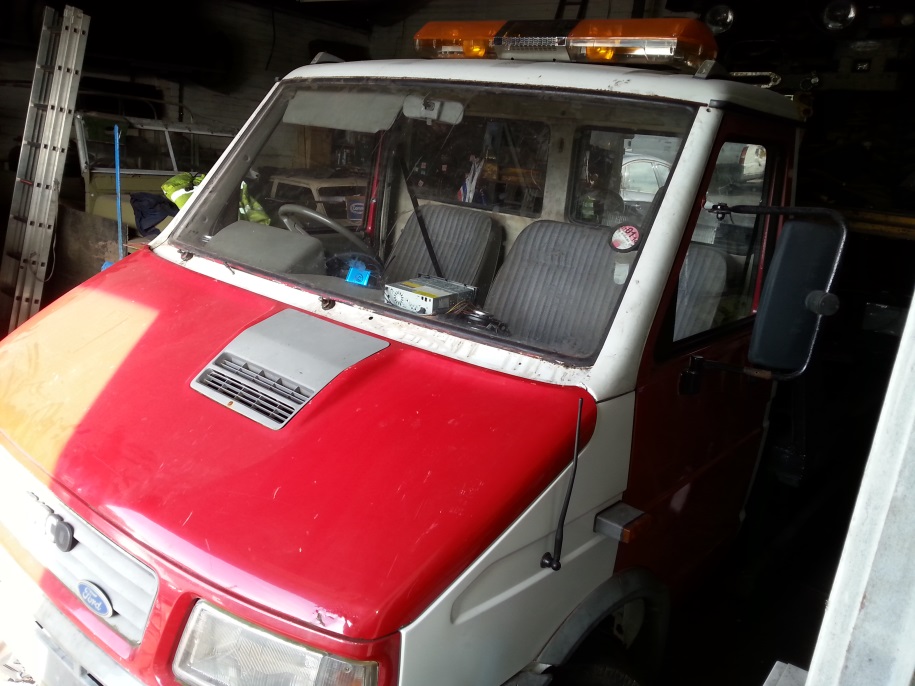
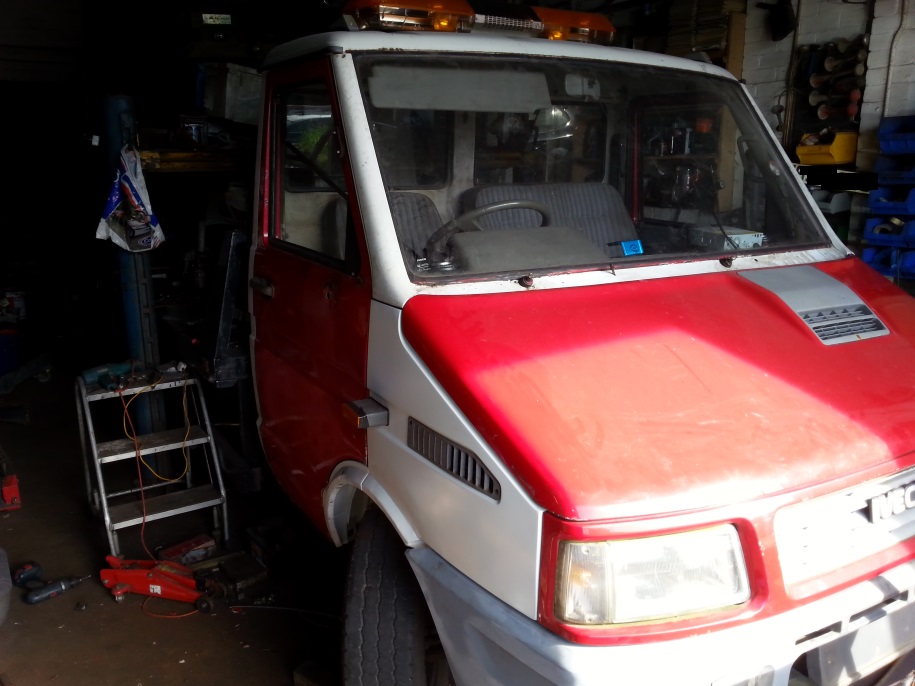
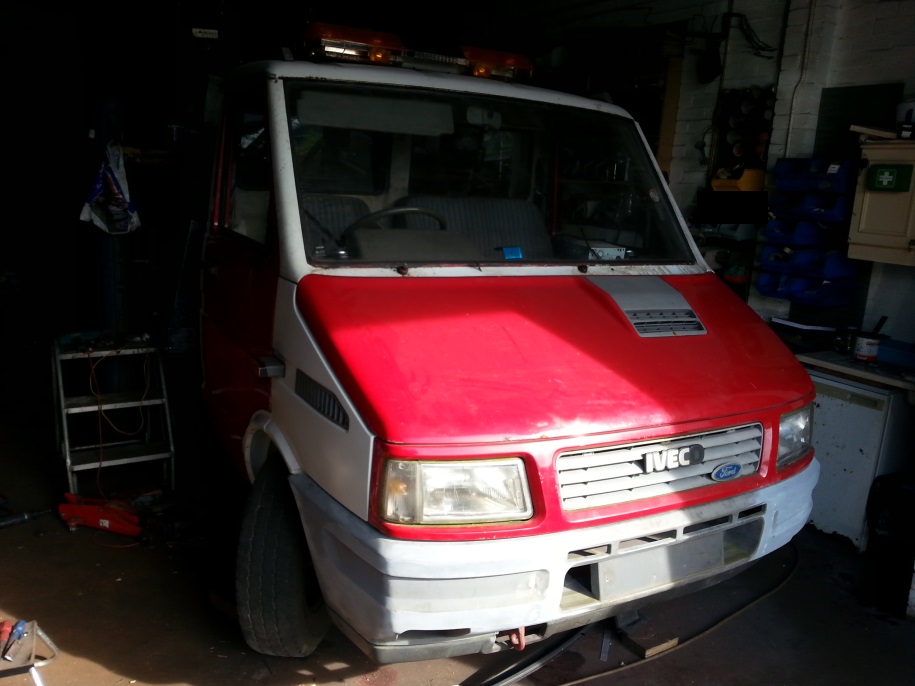
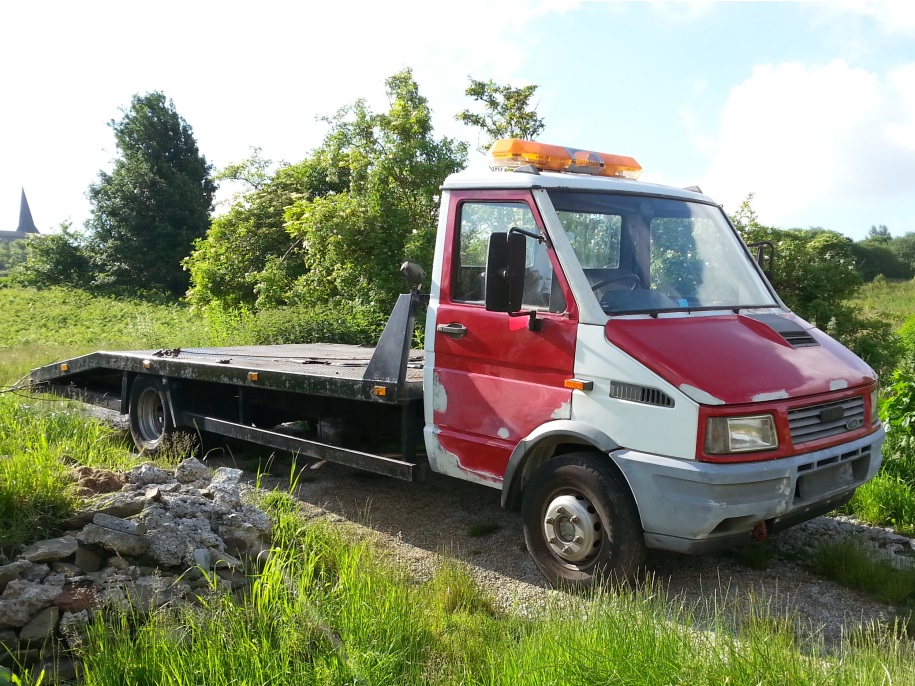
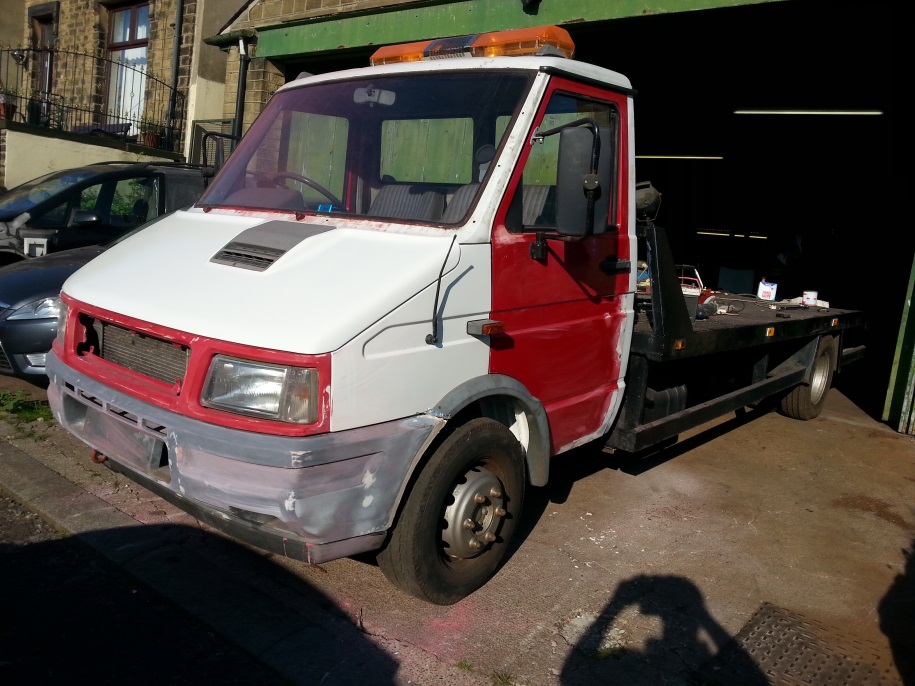
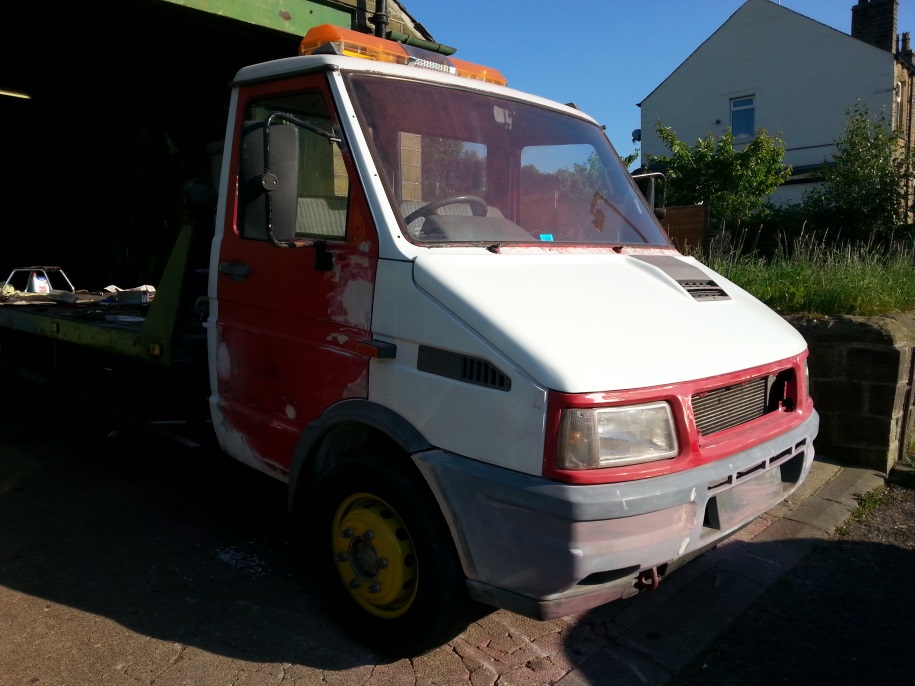
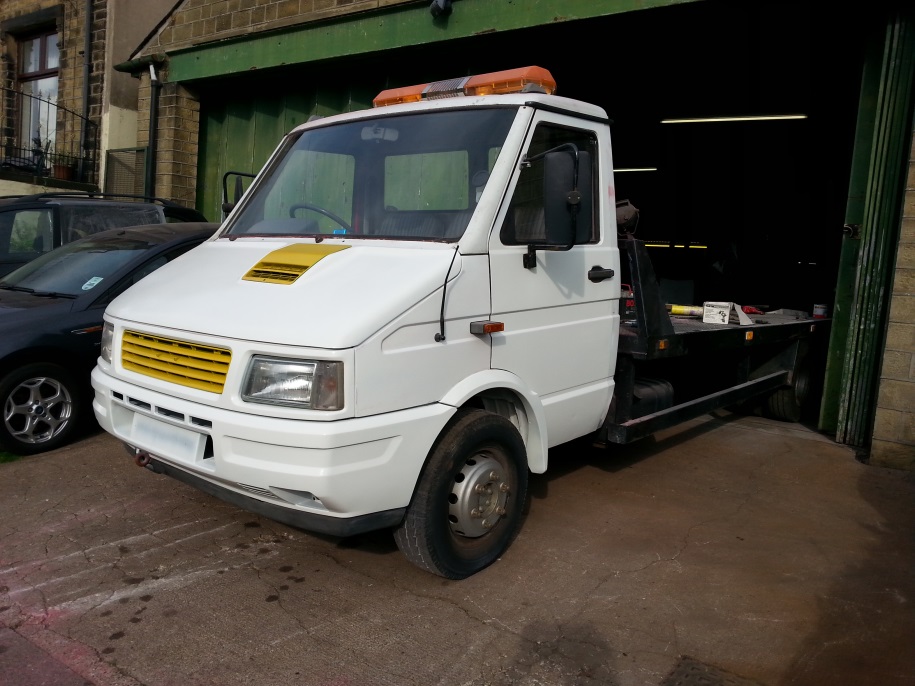
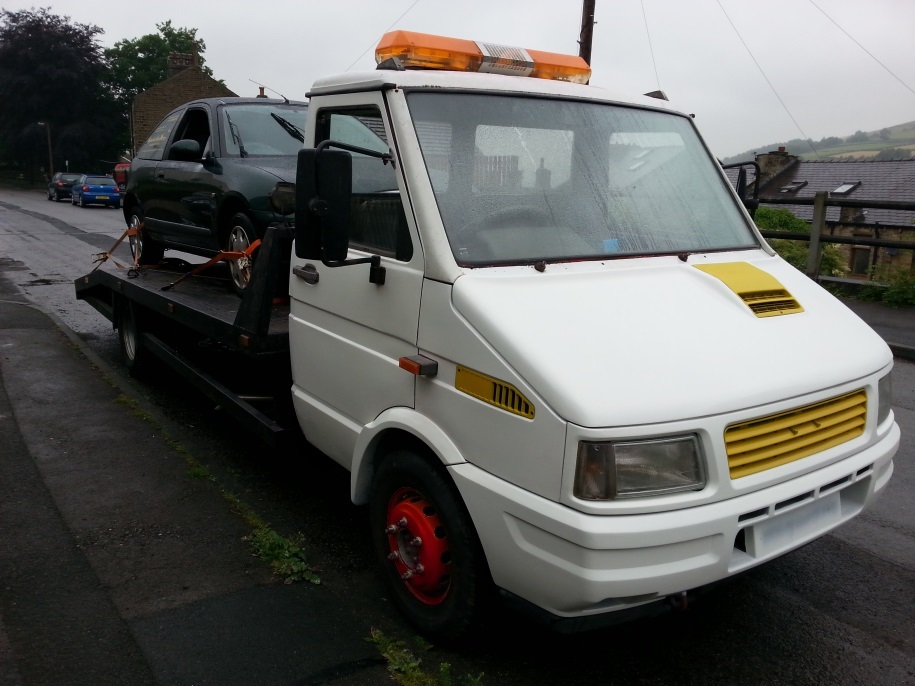
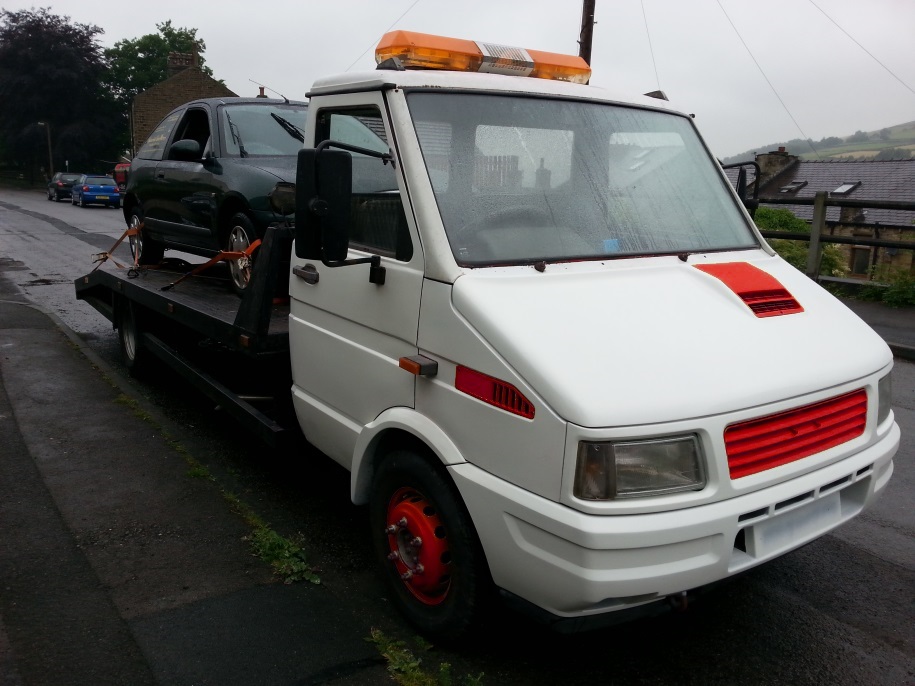
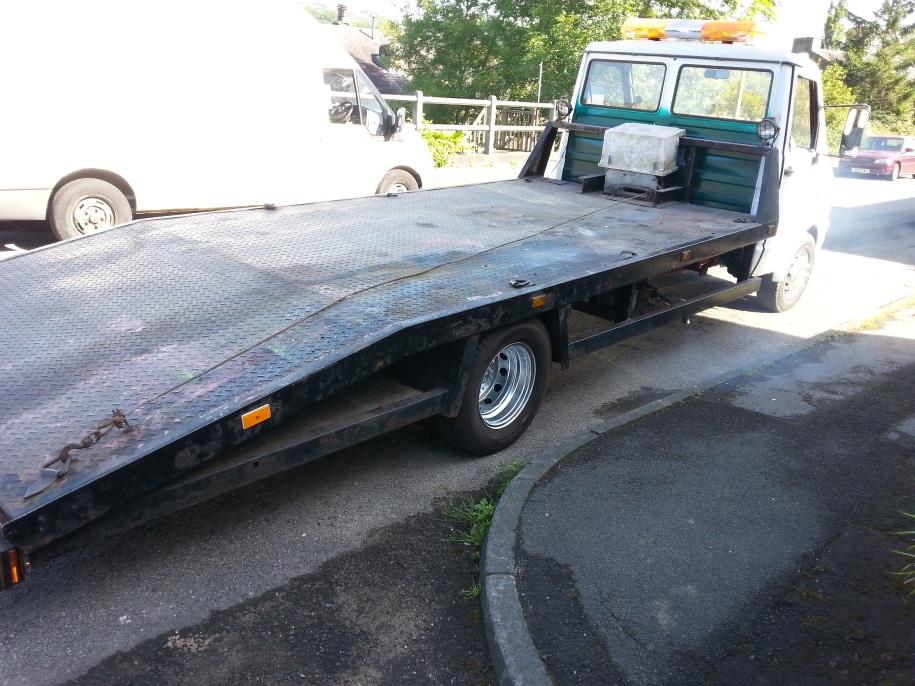
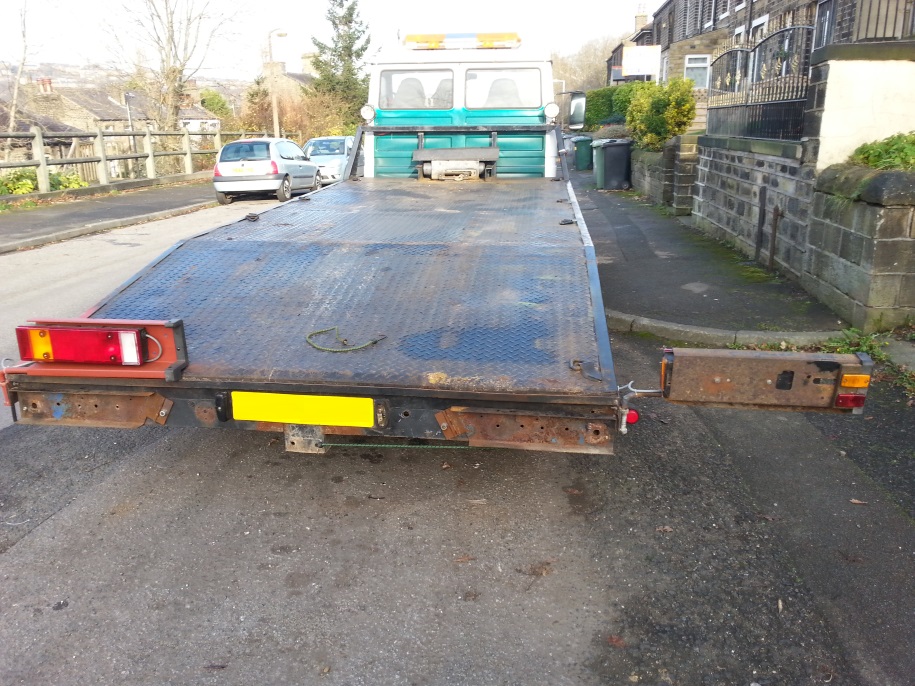
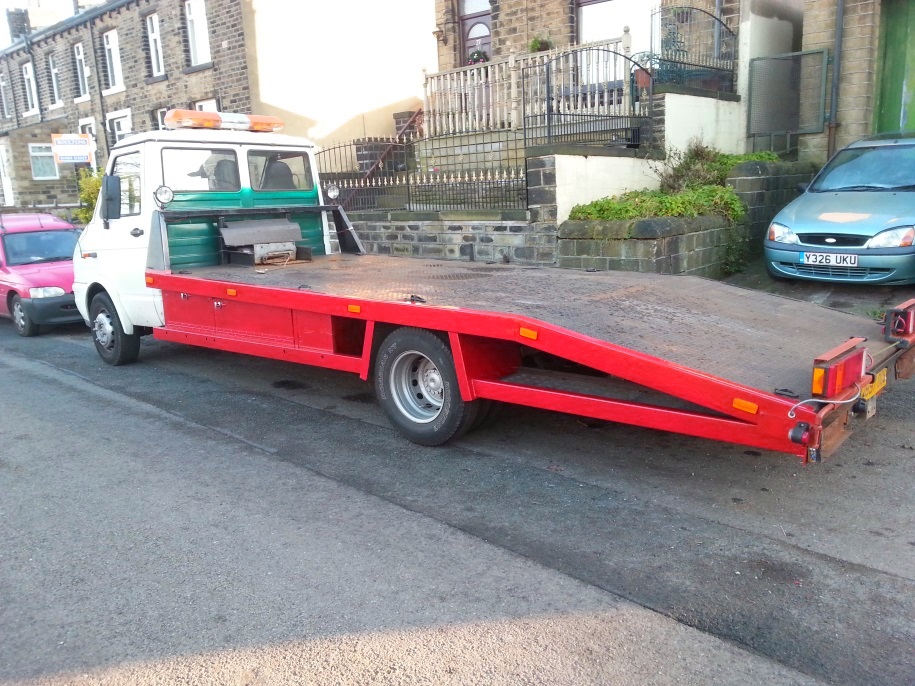
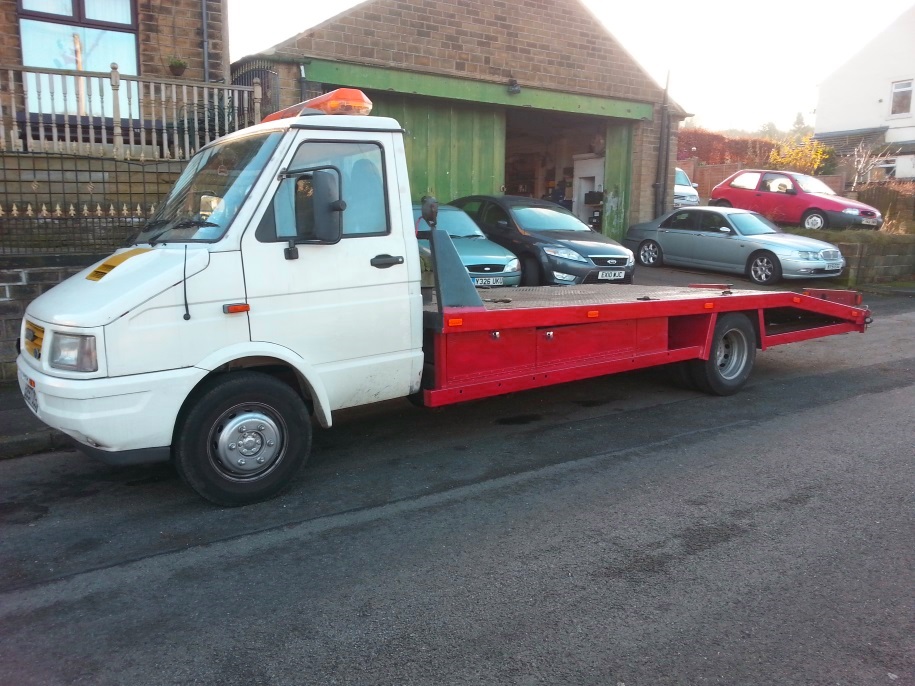
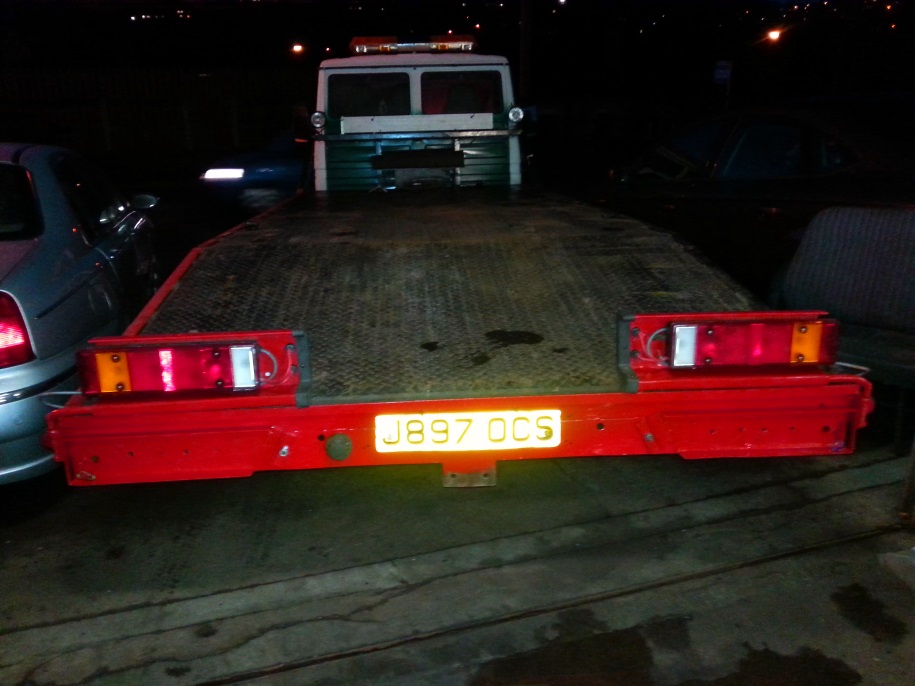
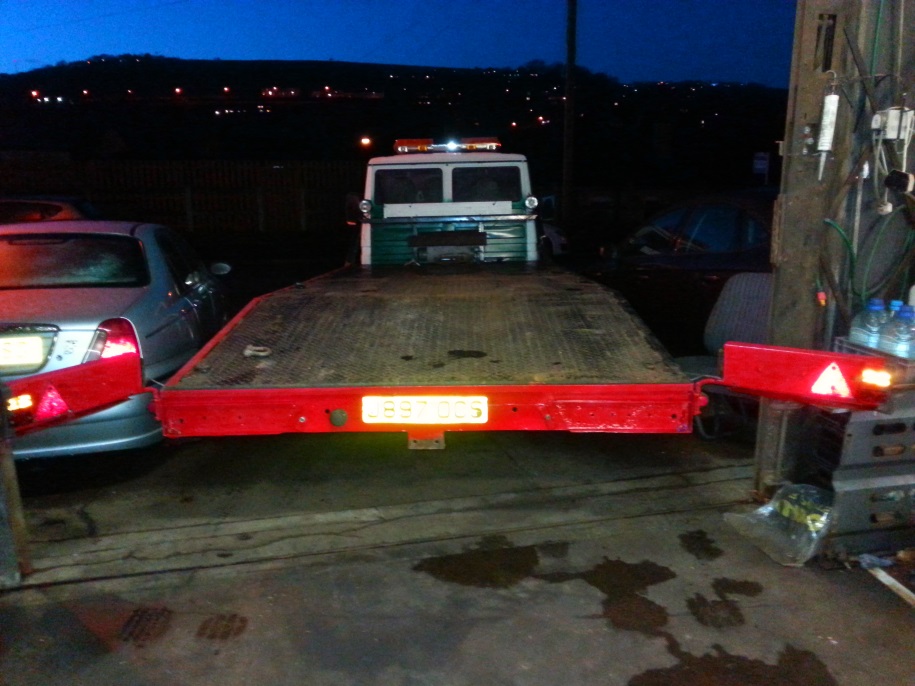
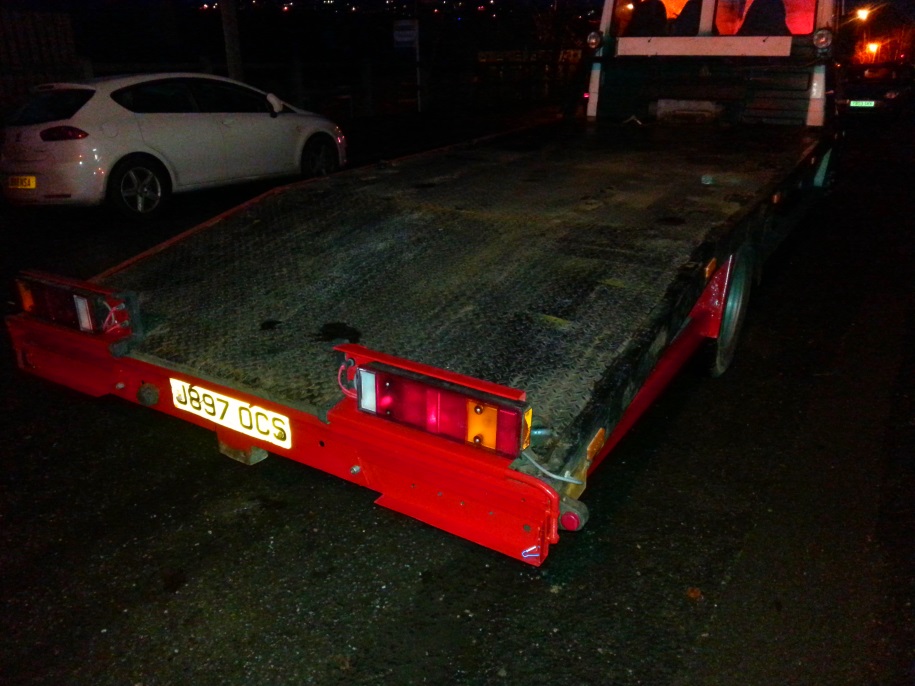
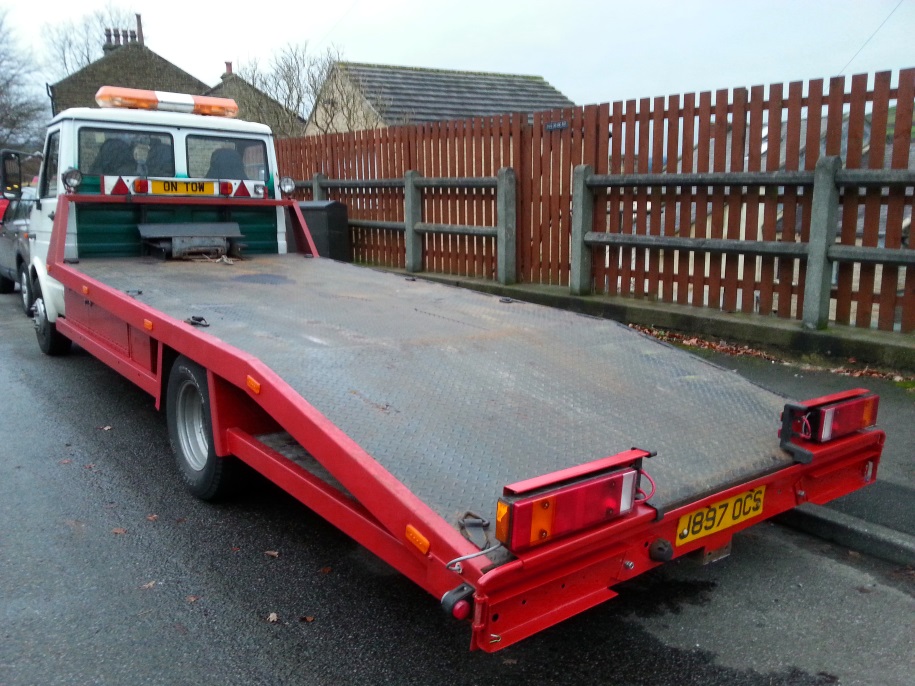
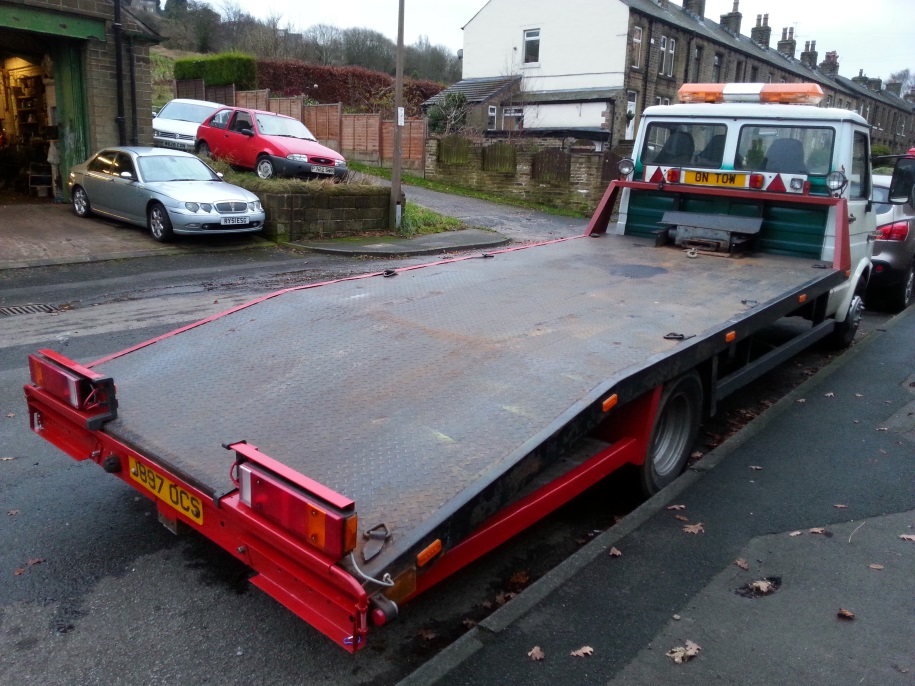
This red truck looks so dam good in these pictures BUT and I mean BUT when your up close it’s a wright old shed, Got my work cut out here LOL.
These are the eBay pictures,
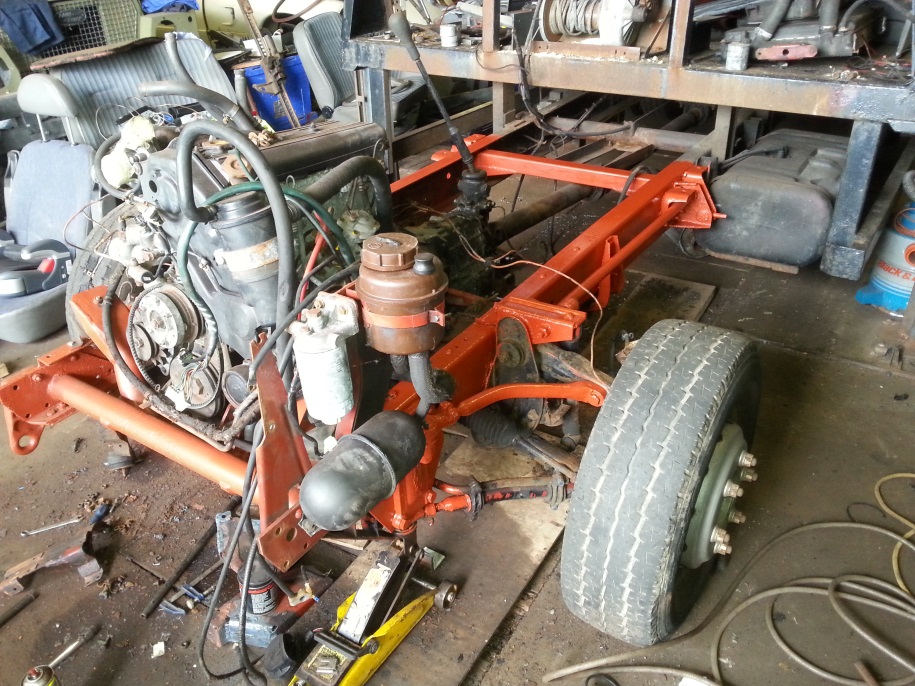
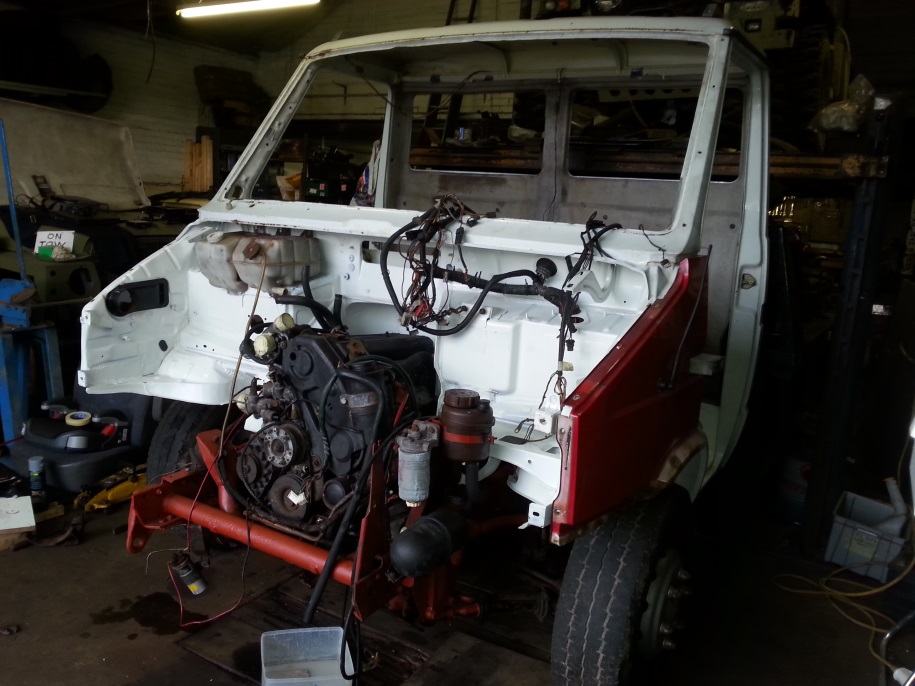
Found this cross member when the cab was removed, Looks like it is a bolt in piece ? Well I hope so any way will find out tomorrow, More welding,
Pressure washed the front end, Found engine mount broken, and the bolts that fasten the cross member to the front of the engine 3 had stripped out all the threads had to drill and tap them to 12mm used some treaded rod to make studs, there was a botched up bracket on the right hand mounting bolt to the engine can just Above power steering pump in picture, I refitted it to give a little extra bracing :huh:
Engine mounts replaced,
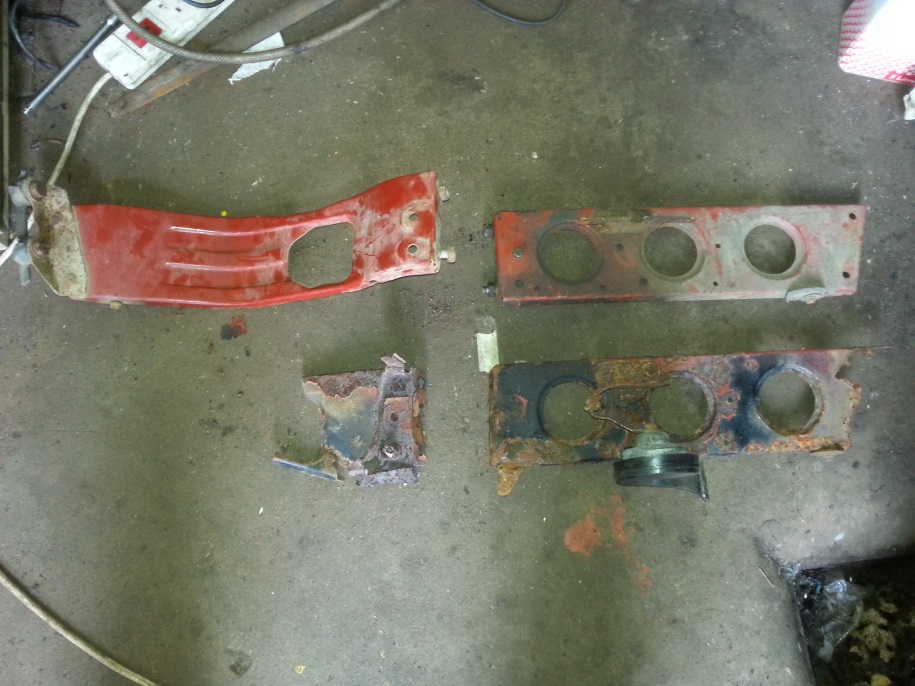
Managed to remove that rotten cross member, Had to drill out the rivets on the cross member to the rear of it and unbolt one side of the gear box cross member then jack the chassis rails apart about an inch
Made a new cross member and fitted it, Just got to mount the centre prop brackets tomorrow then it time to put the Cab back on AT LAST 😀
A Big Thanks to my son Leon he worked till 9 on Sunday night soldering wires together removing lots of those unwanted plugs,
Thanks for scrap yards too, Got some bumper brackets the other day think mine have seen better days,
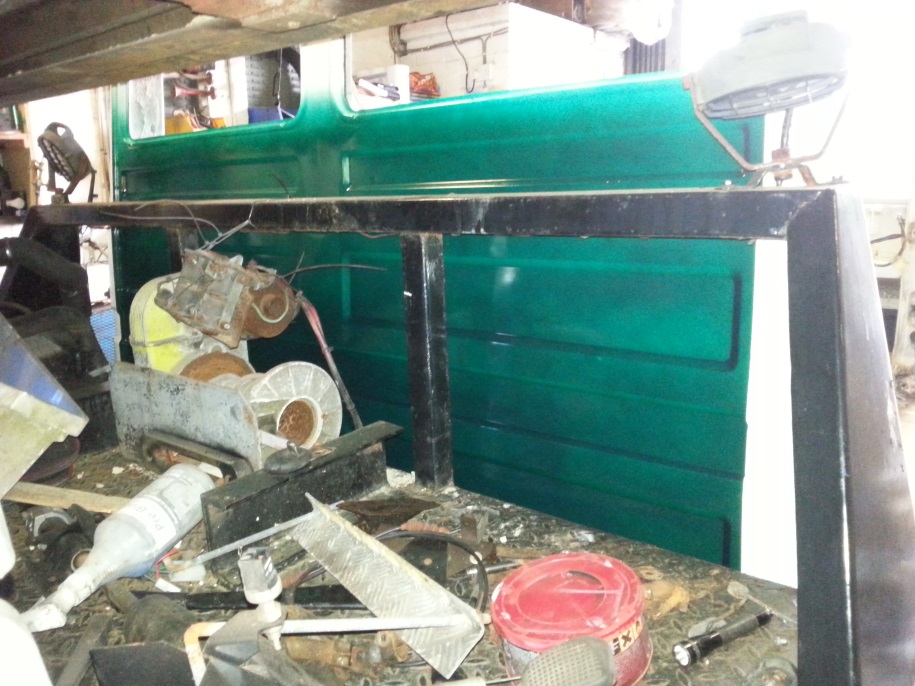
Managed to painted the back of the cab in British racing Green Metallic before dropping it onto the chassis :blink: Not happy with the paint very patchy, But will have to do :unsure:
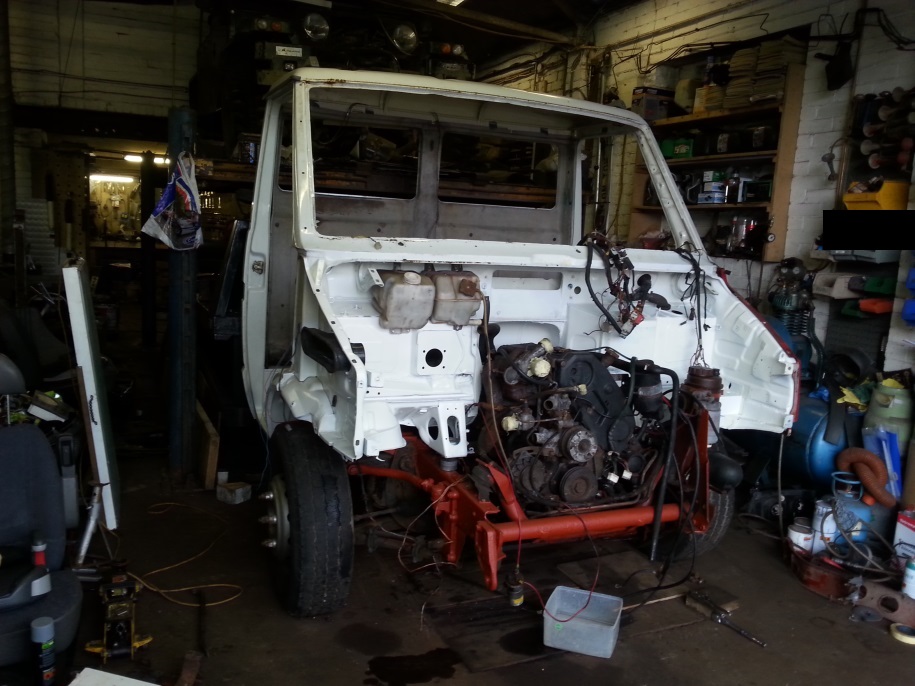
Cab sat in place at last 😀 😀 I can start to build it back up soon be there,
When I tryed to fit the clutch cable today I found the Bulkhead hole all cracked and needed welding burnt the new paint,
Repaired and fitted OK,Fitted windows front and rear, Pedal box and servo,
Fitted the handbreak, Gear lever gater and column and gater to find I had to remove them all to fit the rubber mat
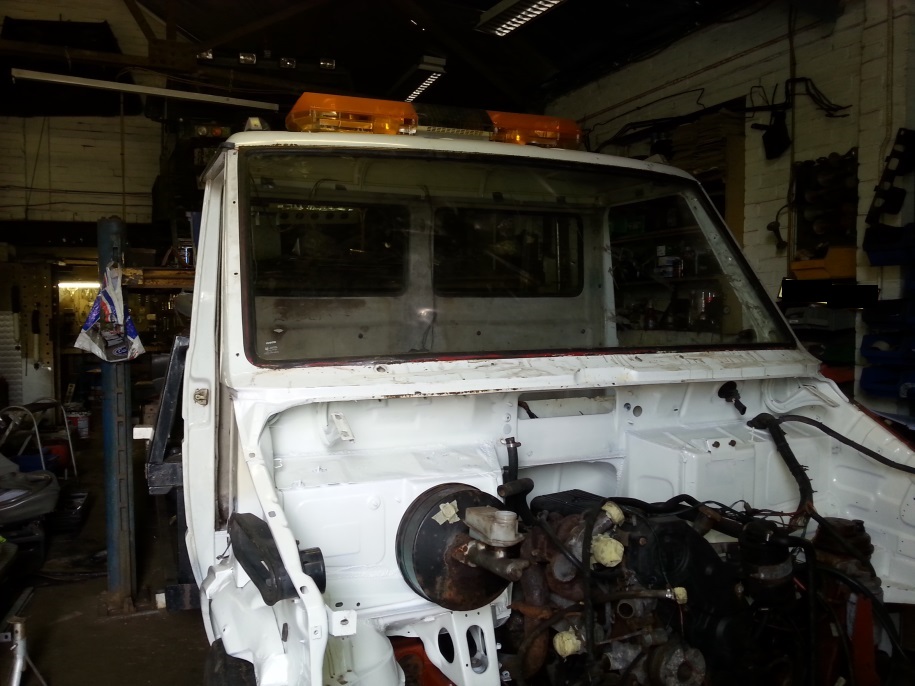
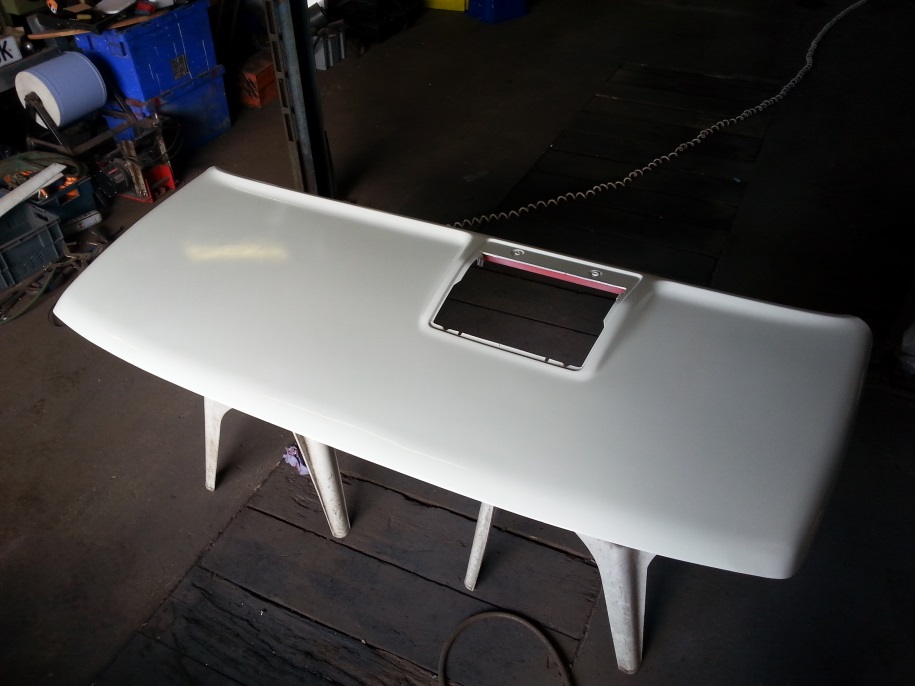
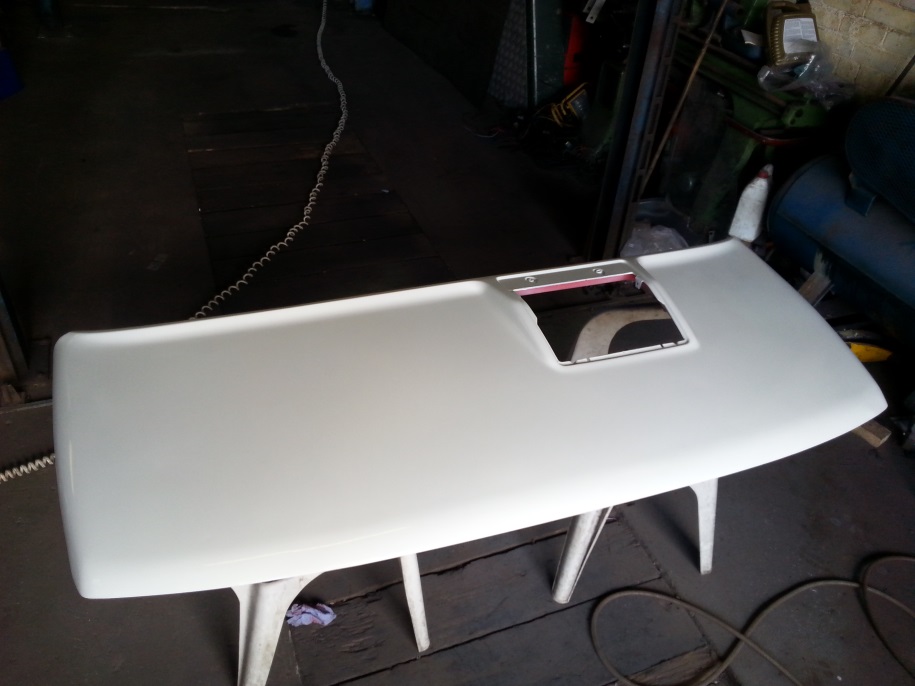
Got lots of bits done today Heater, Dash and most wiring behind dash, run wires up to roof for beacon, mounted various things under bonnet,
I will fit a new timing belt before the rad goes’ back on need to find a new 3 bolt fan blade or drill something out to make it fit!
Had a couple of good days at it, New timing belt fitted belt cover had some gaps so patched them up, exhaust sorted, Oil cooler pipes and power steering pipes secured, Bumper brackets and Air box mounted, accelerator connected, Radiator and inter cooler mounted and connected, She starts and runs,
If anybody had said it would take all day to make and fit brackets to the fibre Bumper I wouldn’t have believed them! So the only progress today was repairing the bumper, and the 2 lower front panel mounting bolts, needs the bumper removing again and the brackets adjusting to raise the right hand side,
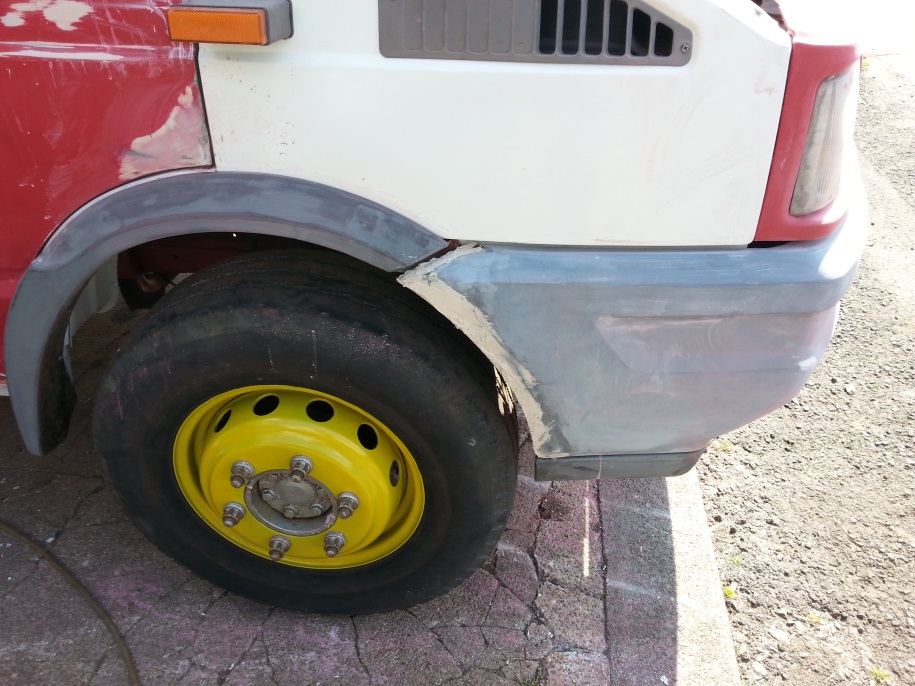
This is the scruffy patching someone did to the drivers side wing, Will post some after pictures below
After
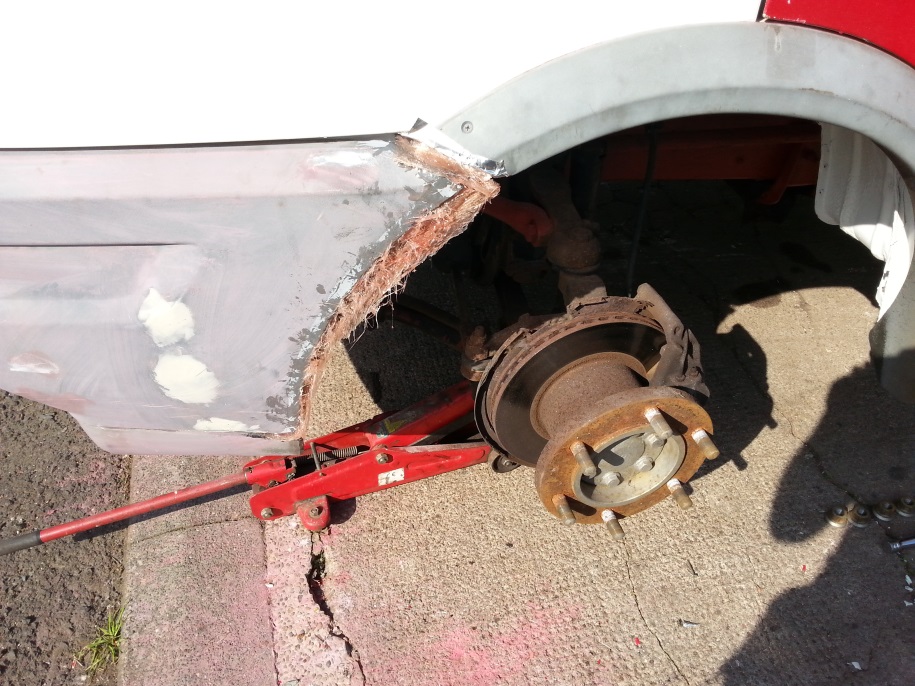
Cut out the corroded areas and the scruffy patching, Time to start again!
Patched up and ground off a little
Just a quick coat of primer to see how much panel beating I need to do? Looks pretty good so far,
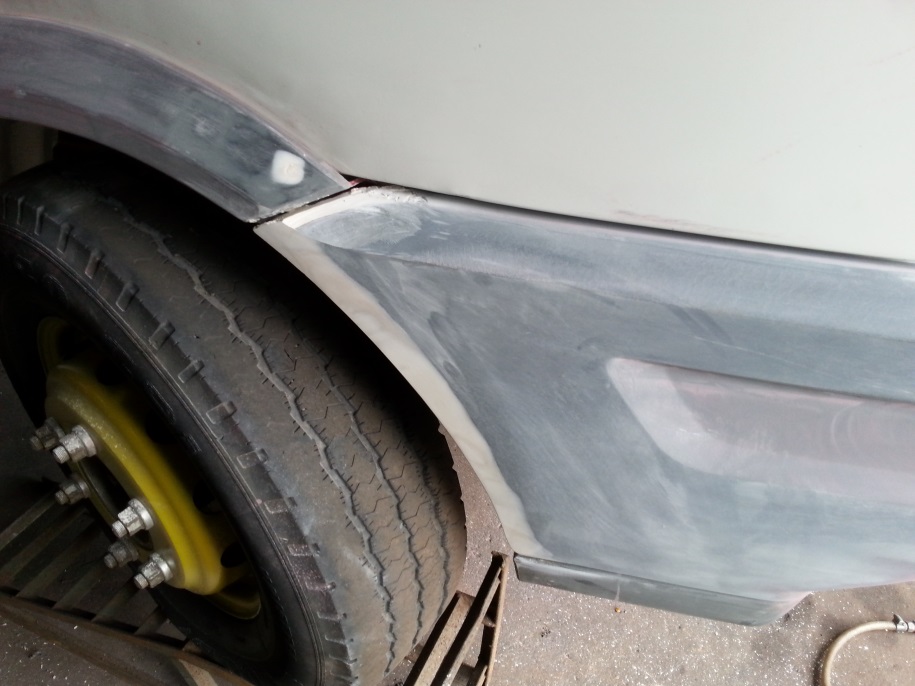
Passenger side wing needs a little work on bottom edge, But other wise it’s not bad,
Got lots of little things completed, Wings painted (had some white left over so it’ll do for now keep it looking clean), Doors mounted and trimmed wheel arches adjusted, The doors are corroded and in a terrible state, but will have to do for the time being till I can find some good ones,
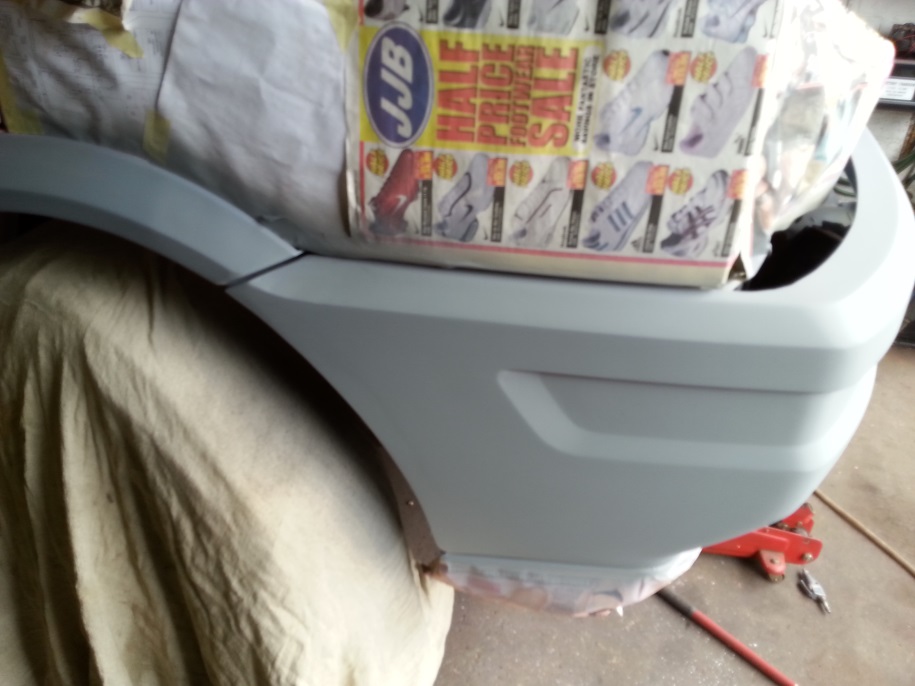
You can’t really see it here but I’ve sanded some of the bumper, Think I’ll colour code it and put yellow reflective in the recessed bits should look good with the British racing green,
Well Well Well ! It vibrated it’s way out of the workshop today 😀 At last I can use my workshop again,
Who said an IVECO won’t fit in the back of a rover 25 the old cab cut up and off the fore court,
Couple of pictures of it outside
Had to wait 2 days to get the rear brakes for the LDV in the back ground, So did a bit more on the Iveco, The rear lights were troublesome they opened outwards and the wiring kept getting damaged, So I’ve started over and reconfigured them to open inwards and rotate a bit for clearance,
Got to do the Number plate lights and I think I’m going to put some side markers on too
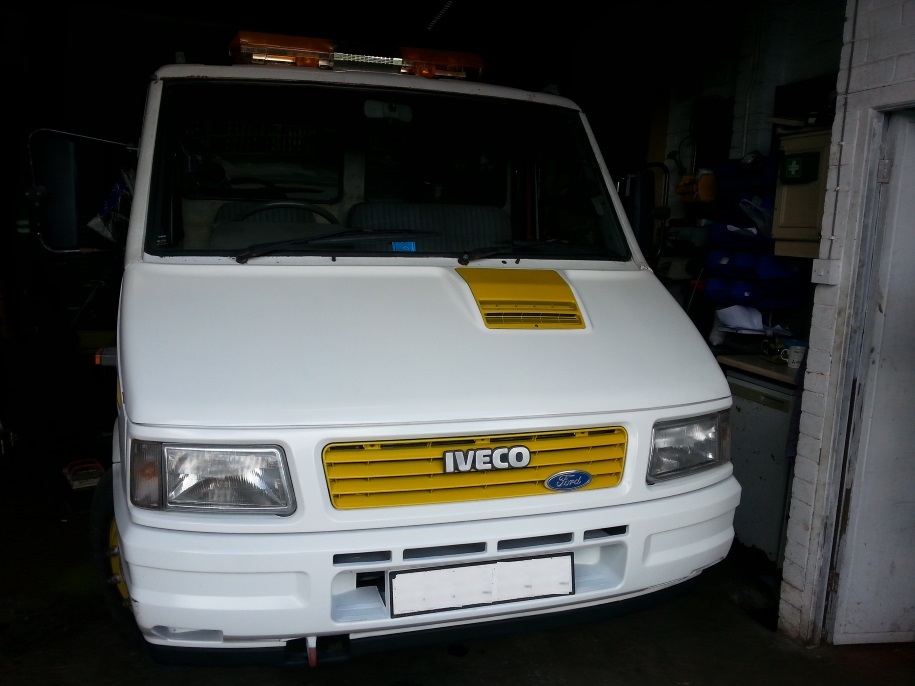
Had some time to spend on the IVECO again, Got some things sorted, Extended arches on bumper I use Duct tape as the fibber glass doesn’t stick to it, painted bonnet 🙂 and test painted a wheel in yellow,
Had a good day things went like clock work so now I have a white and Yellow Truck YES yes yes I know the yellow looks crap with white but the truck will be British racing green metallic When I manage to find a couple of doors with the correct mirror mounting points,
Just had to have a play with the new TOY, every thing work as it should
Need to make a lockable cubby under drivers side body of the straps and things,
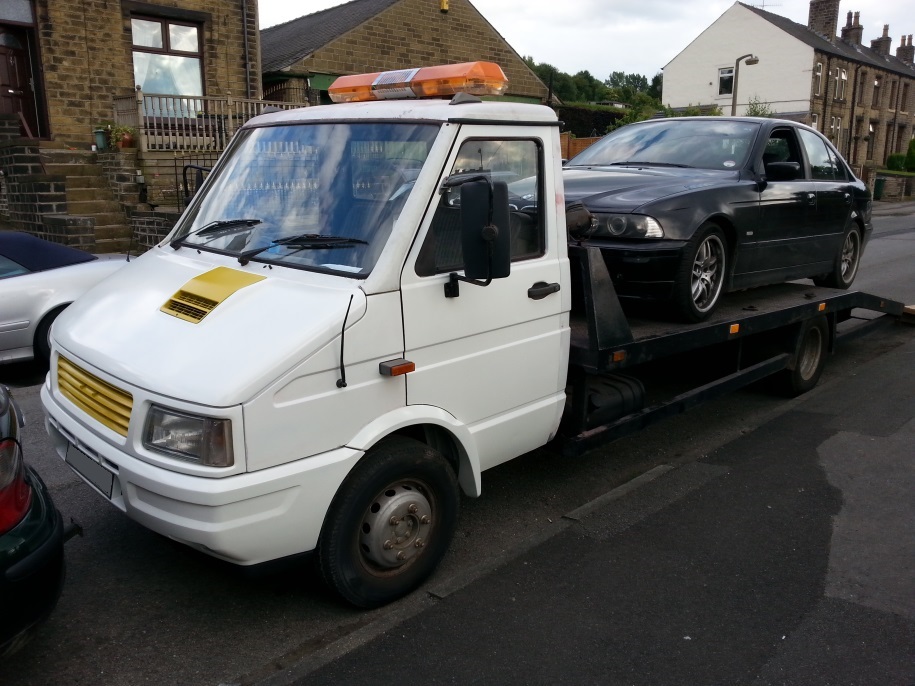
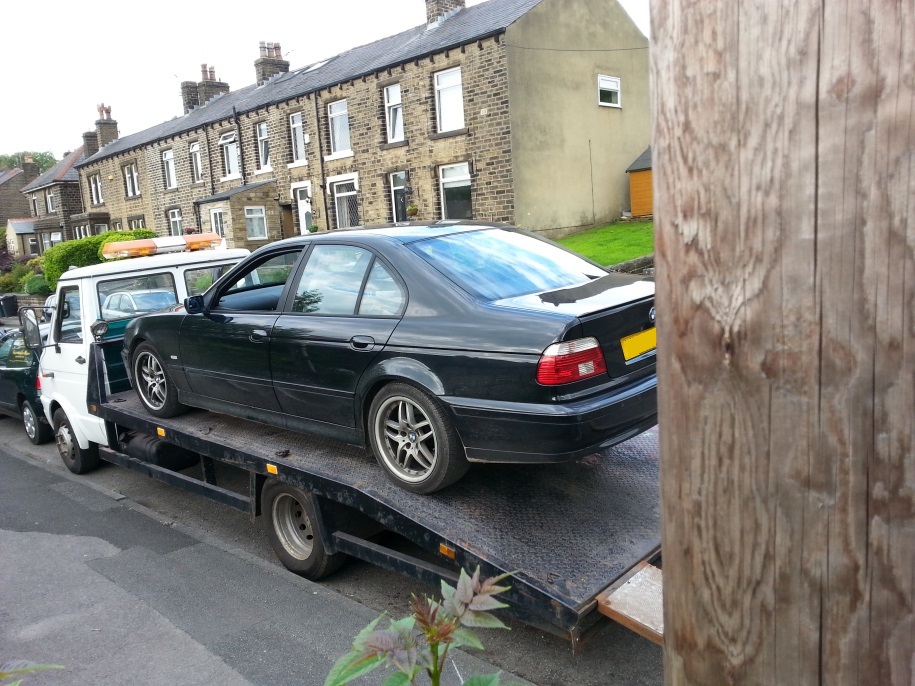
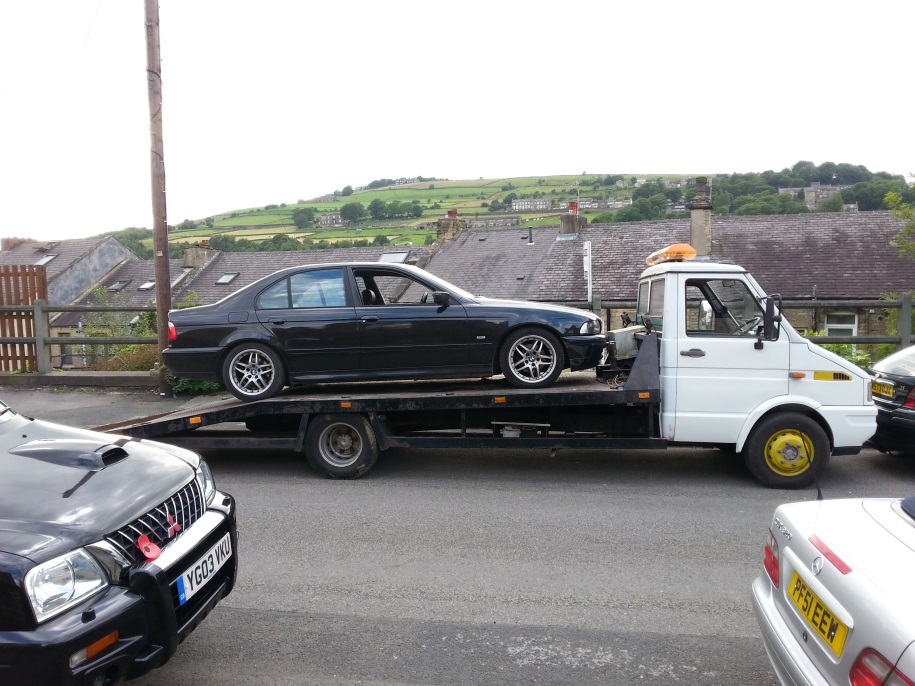
Getting my son’s M Tech BMW on the back showed that the ramps are steep’ had to coble up some wooden extensions to get enough clearance, Still better to find out at the workshop than at the road side, so now got to find storage for them too,
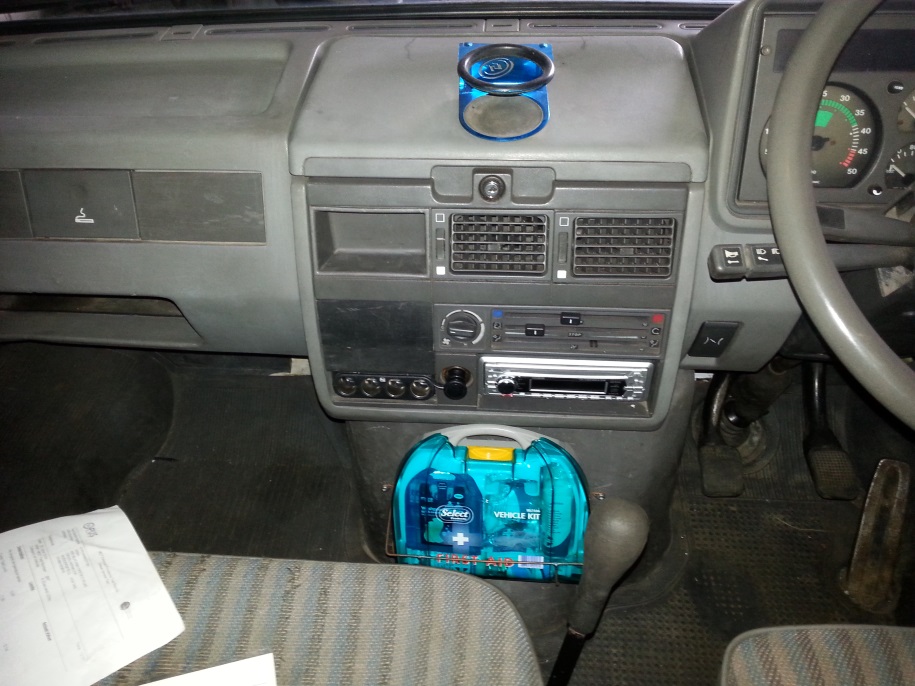
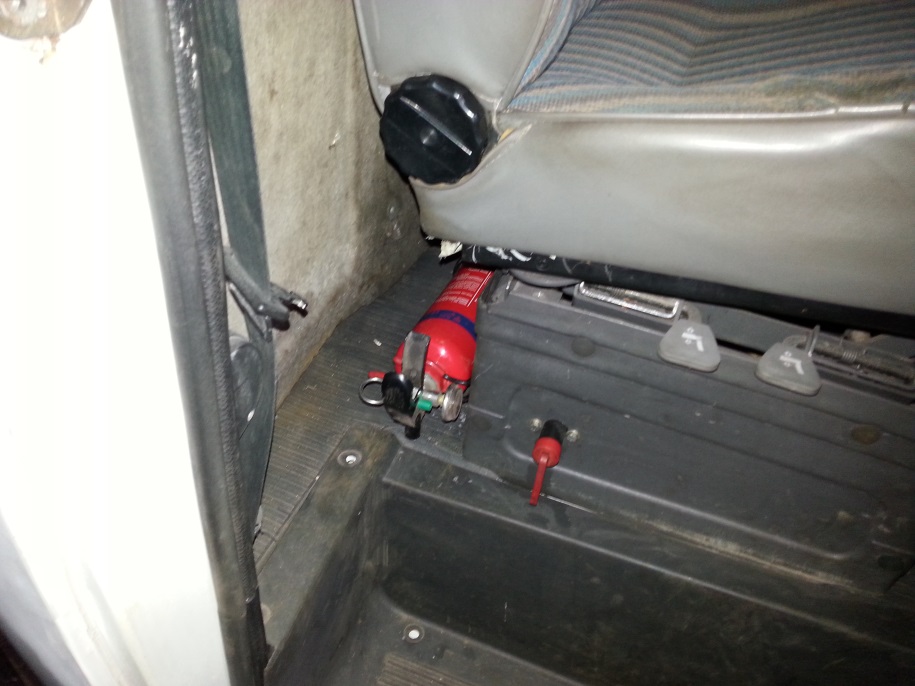
Couple of more bits fitted “First Aid Kit and fire extinguisher” made some blanks for the holes in dash and fitted some power out lets,
Not been able to get another front badge so wondering what this will look like with the masking removed !
Well removed the masking and the black back ground is too close in colour to the letters don’t show from straight on,
So did a little salvage work and stuck some ducting tape on it, cool LOL
Had some people saying leave it White it looks good and a customer said why not have red wheels, So had a little play with paint.net here’s the images,
Hum I like some of them but the company colour is green and yellow
Thanks to a generous member of The IVECO forum Petecl I now have a Tacho and some freebies, Opening that box was like Christmas all over, 😮 I’m sure you said you had posted it before I mentioned about the front badge, and a window regulator, WoW You must be a mind reader ” bet that was a fast 1 seconds worth There not much in my head” Thanks again pete you a super star,
PS the milage on this Tacho is spot on Well mine is Mh an this is Kh so clocked a bit LOL
And the Window regulator, My son put me a 6 speaker system in from that old Vauxhall Zafira that can be seen in the back ground in some pictures
New Tacho fitted Didn’t like the little clock in the Tacho so Fitted a new one neer heater controls,
Managed to figure out the spot light wiring, Fitted a new switch & relay and some old spots I had,
Also fitted a buzzer to the winch switch so I don’t forget to turn it OFF
Is it a truck or a Christmas tree LOL
Truck is ready now for the Tacho Calibrating and sealing, then it can be MOTed 😀
Did some work on my sons BMW wheel at the weekend painted it in some lovely Chrome paint and wow it looked fantastic until I sprayed some clear lacquer then all the chrome shine disappeared, a big disappointment, So waist not want not as they say, the truck wheels now look shiny wonder how long it’ll stay that way ?
admin
25 November 2014 - 20:19
Little update on truck
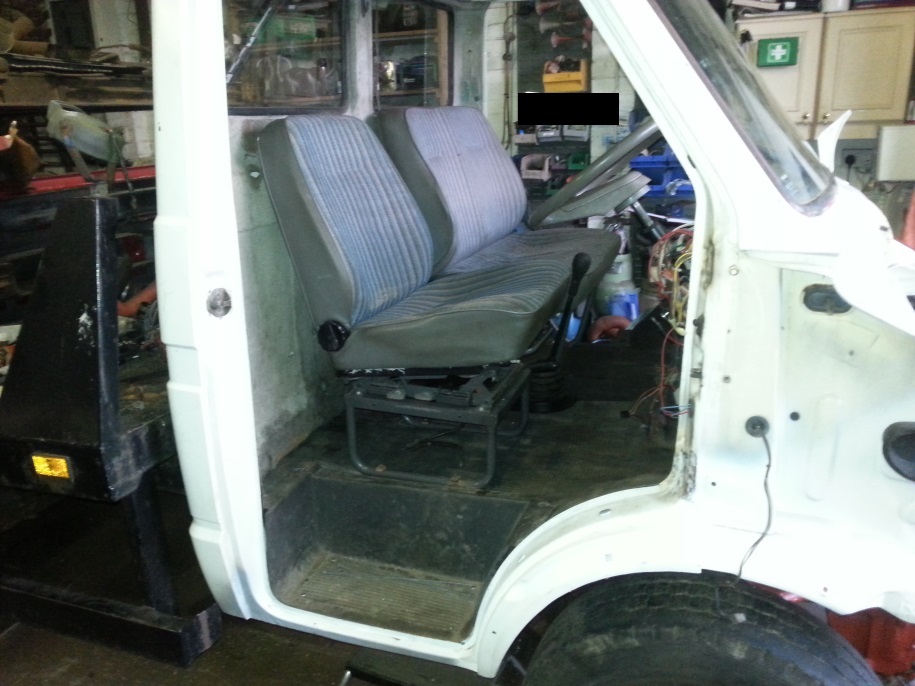
Fitted some transit seats, didn’t like the centre seat having a lap strap, So now it’s got proper seat belts and some cheep covers off eBay the drivers seat has both arm rests so comfy too
Also fitted some lockers to cover diesel tank and some were to store all the straps so there not on the cab floor any more
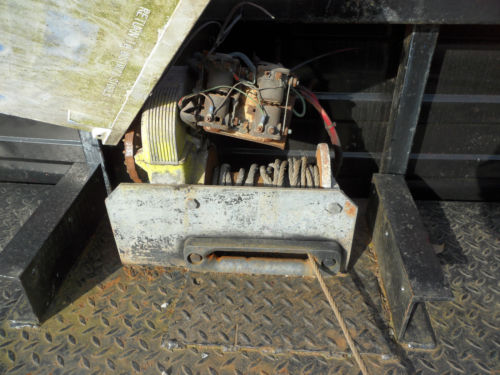
Were I live in Huddersfield it’s hilly and I’ve broken the rear lights 7 times so I’m reworking the rear lights and giving my self some safety space too, Fitted a new winch that sits lower the old one still works but was too high,
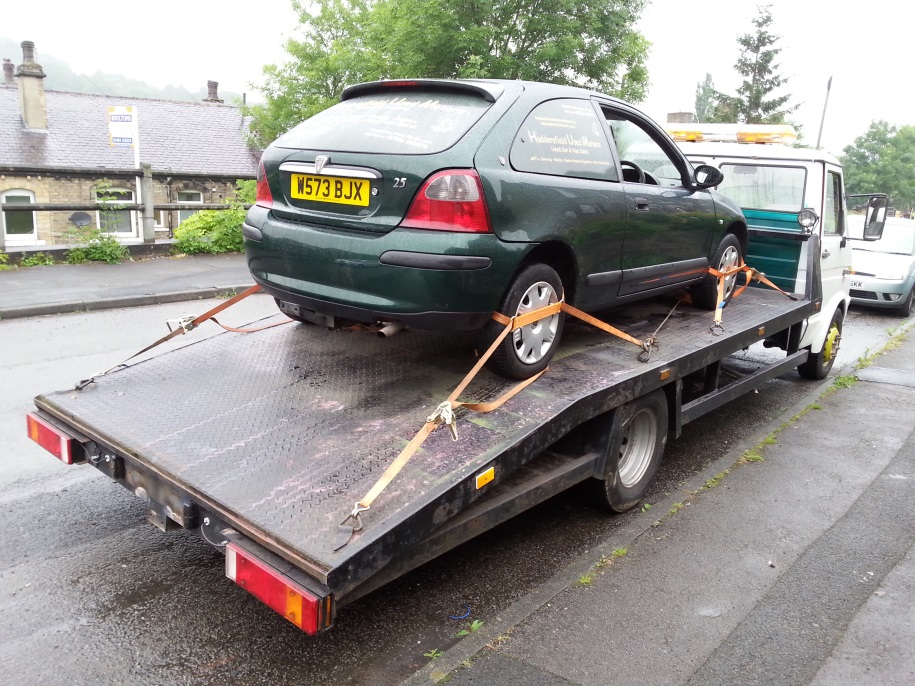
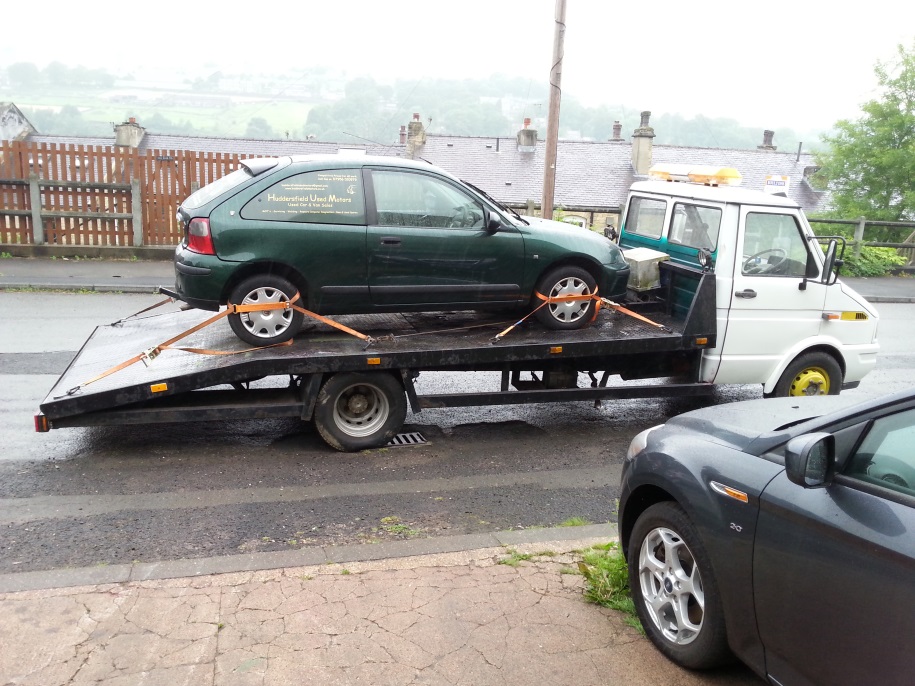
Next is to make some new ramps as lots of modern cars are so low I’m have trouble loading some a new shape Renault Espase was to low to load!!!
admin
5 December 2014 - 19:23
Managed to get a little paint on this morning before I had to go out on a recovery with wet paint
admin
8 December 2014 - 18:35
Cleaned the rear end and got some paint on, Just need to cut that tow bar off,
Started to mount a tow board on the rear loop to hang on the back of any thing that over hangs,
admin
10 December 2014 - 07:53
Little more under coat on and it’s still light today,
Finished the light board mounting and lock
28 Comments
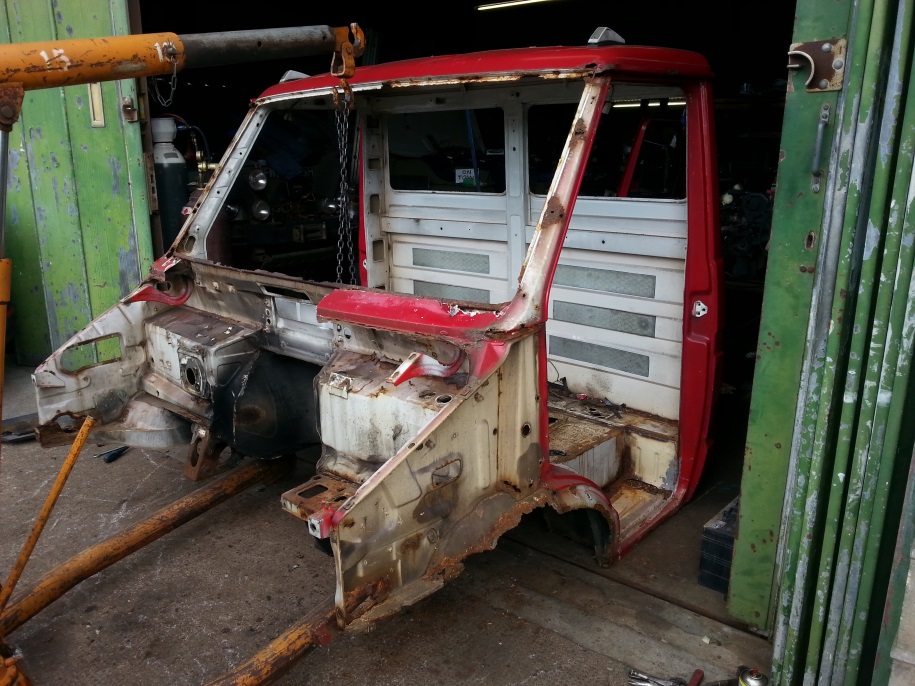
admin
28 March 2014 - 21:56This red truck looks so dam good in these pictures BUT and I mean BUT when your up close it’s a wright old shed, Got my work cut out here LOL.
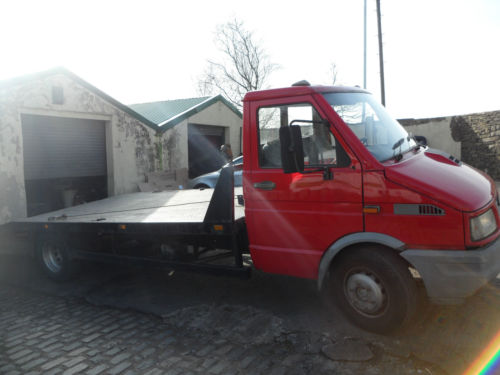
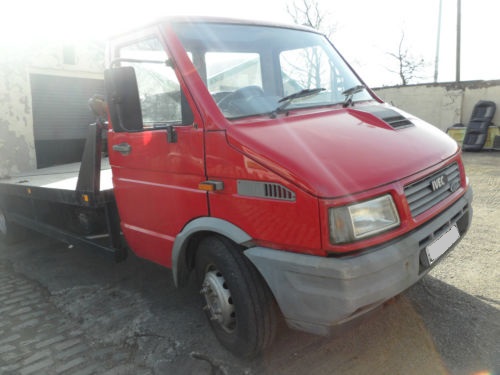

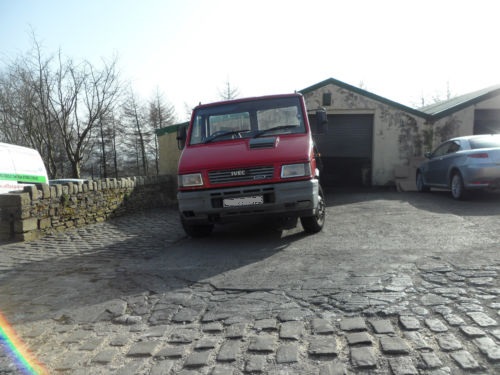
These are the eBay pictures,
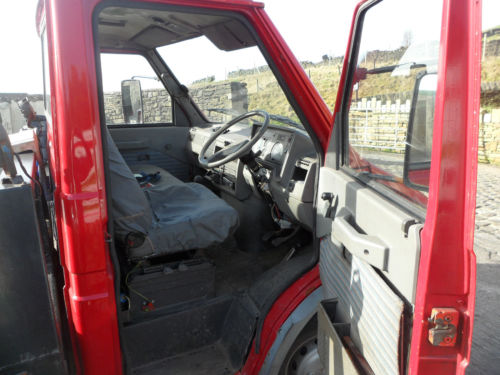
admin
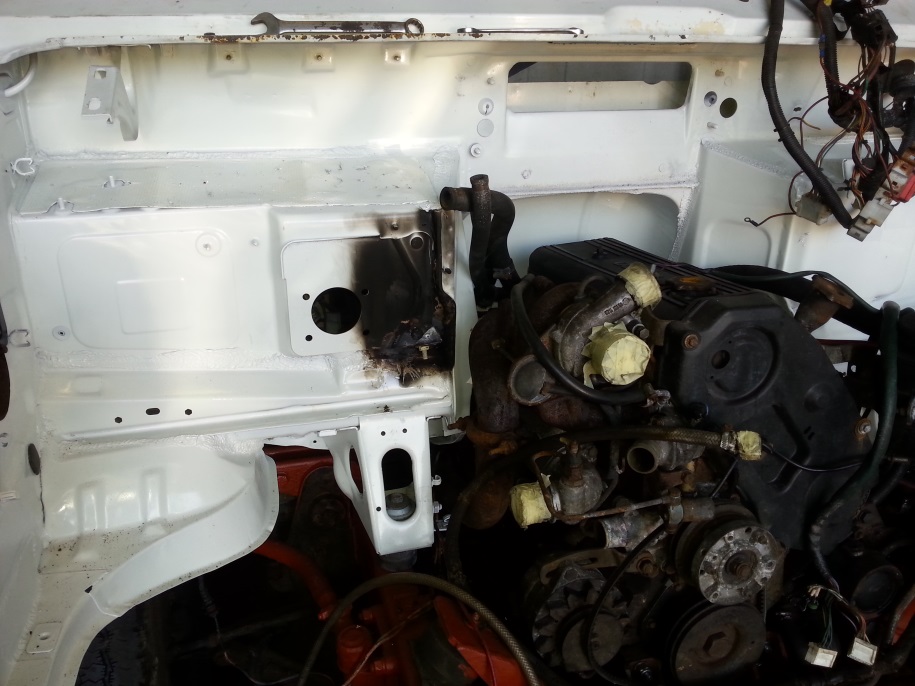
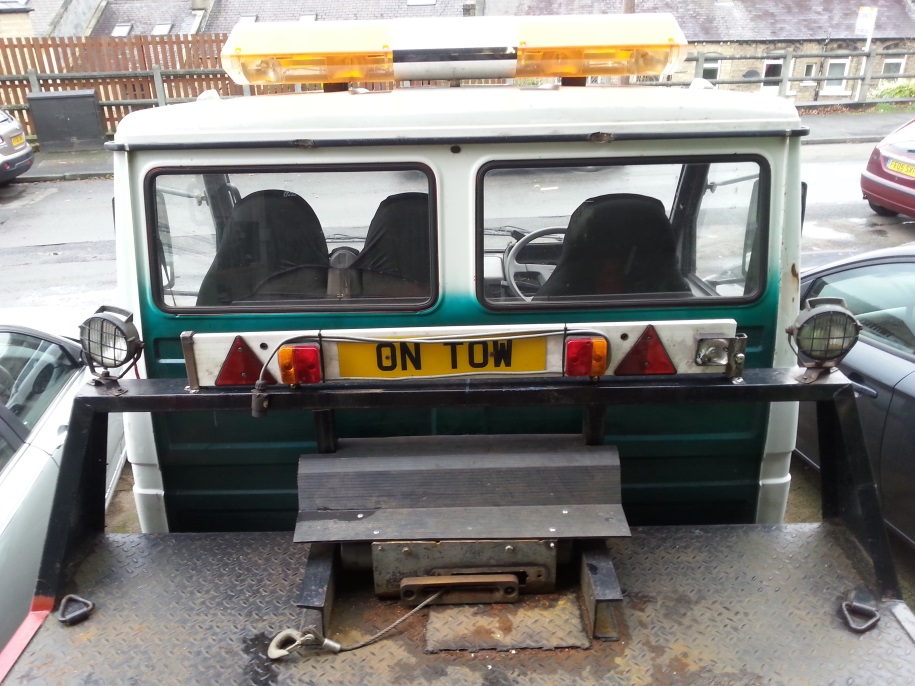
29 March 2014 - 18:14Now the carpets up we can see there’s not much cab left
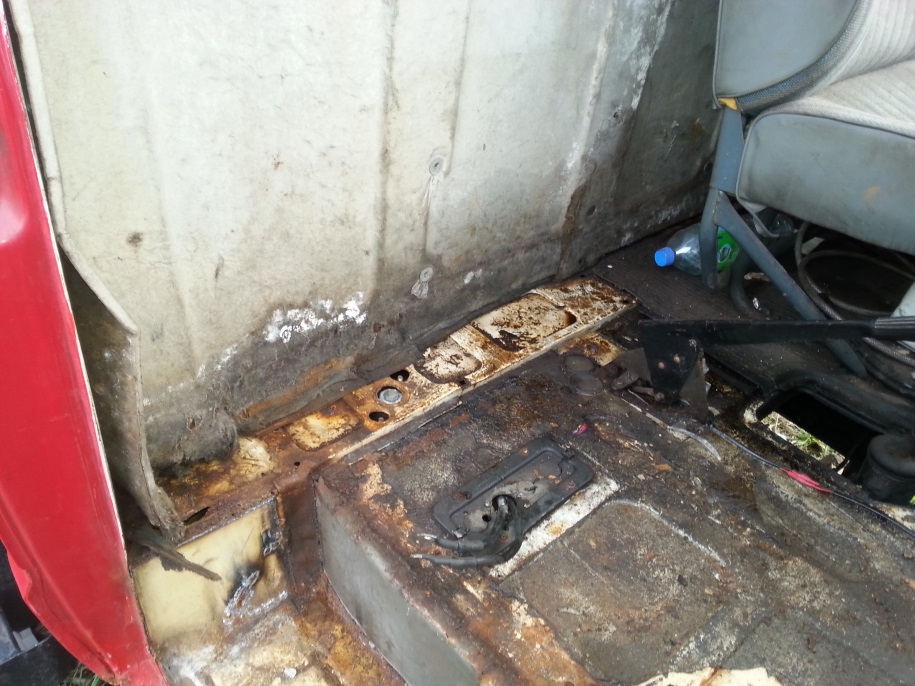
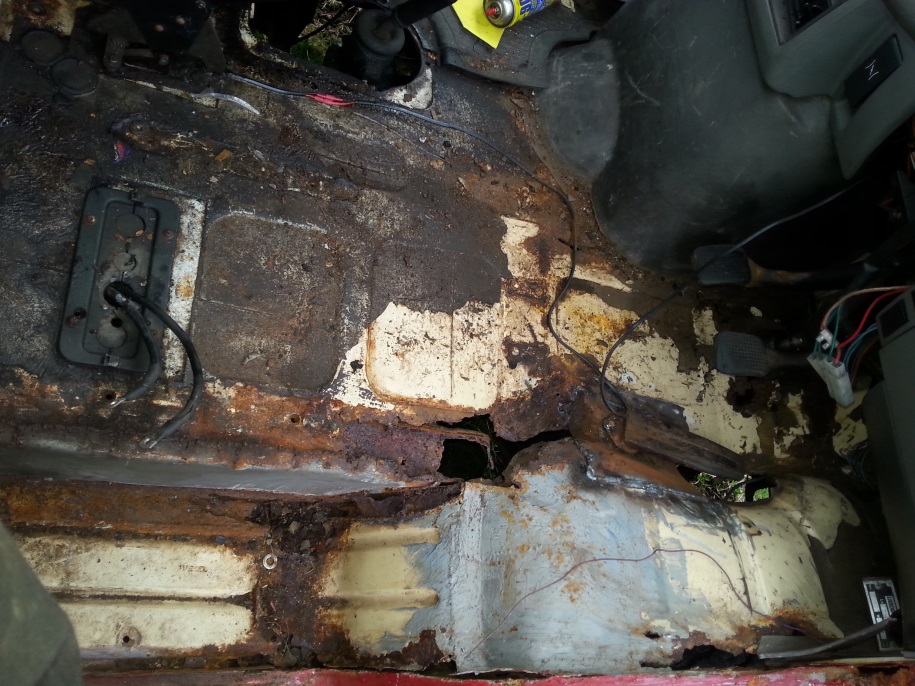
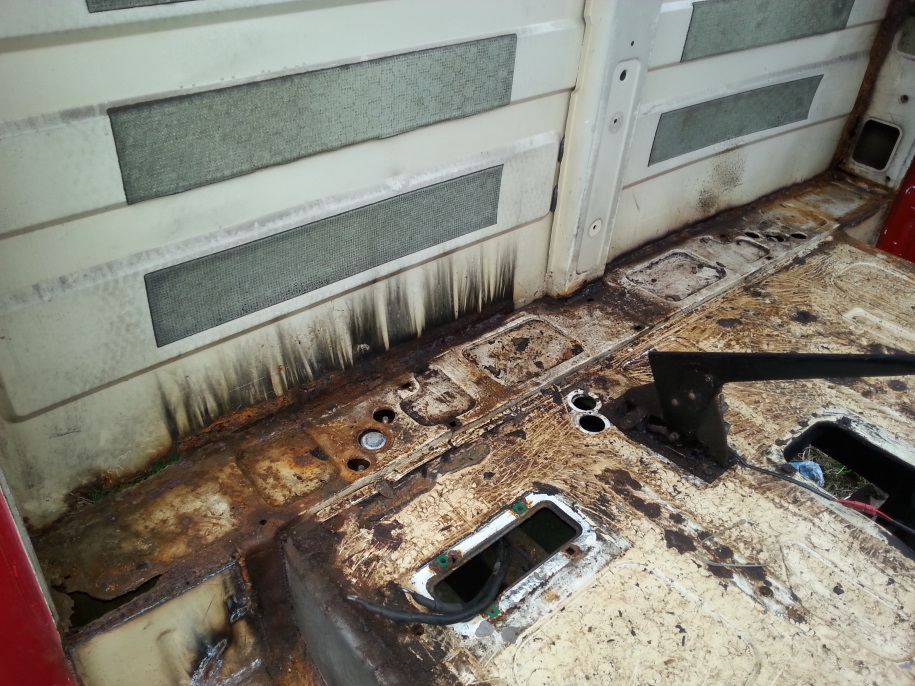
Some one welded a bit in to support the throttle and left the rest !
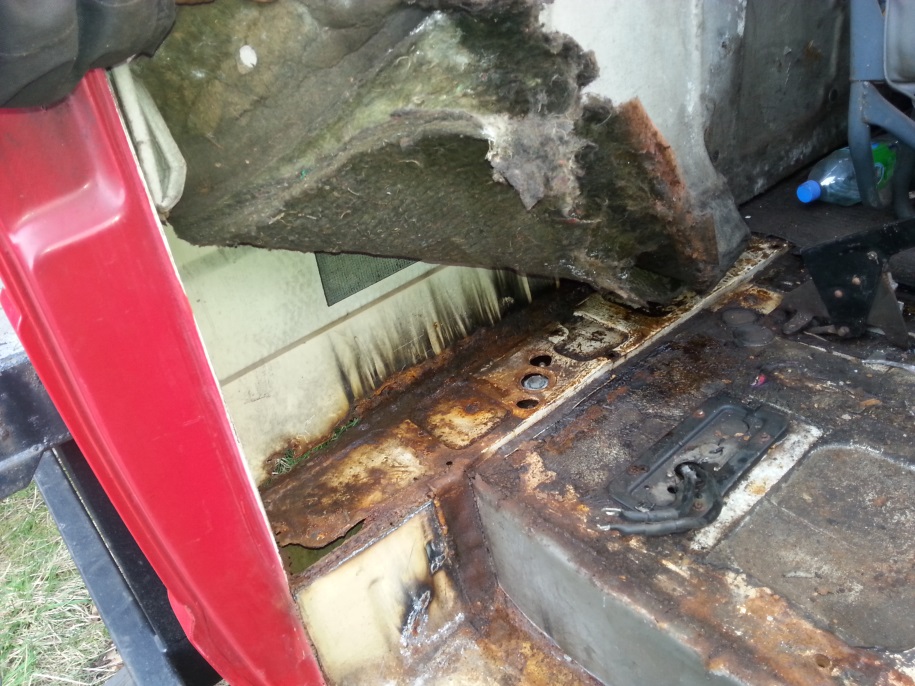
admin
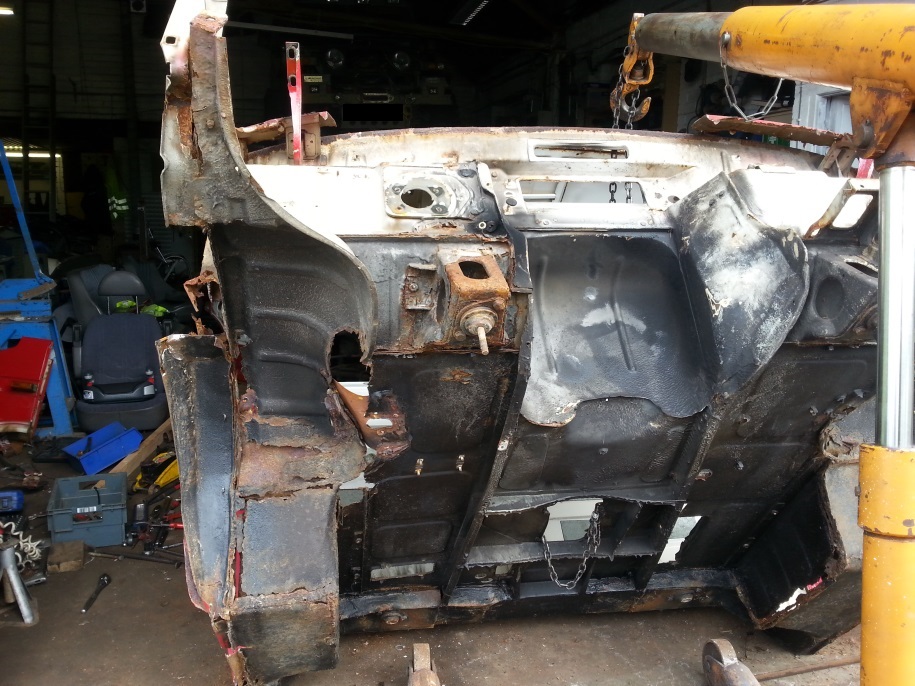
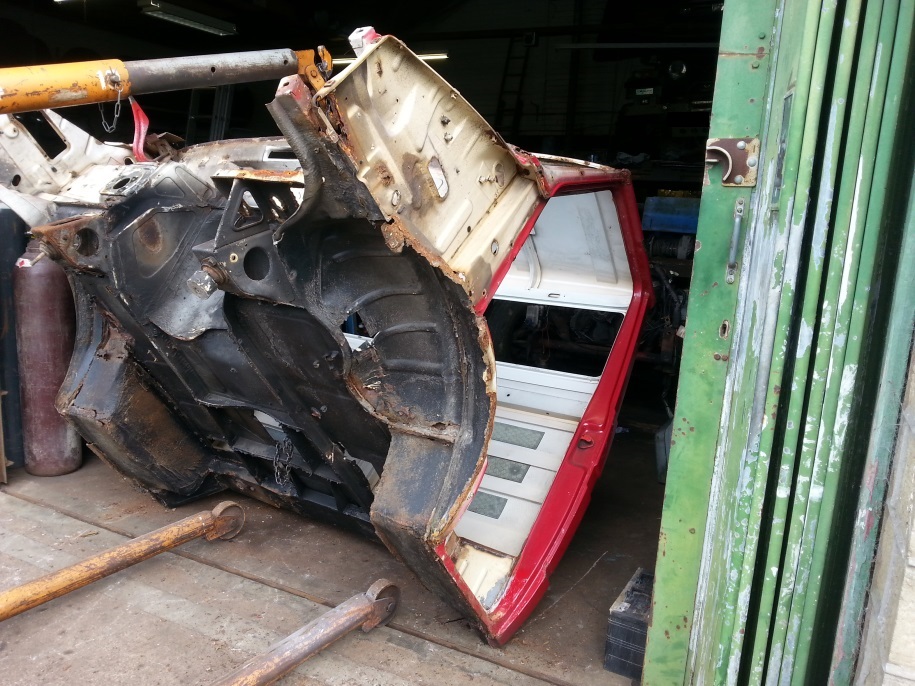
15 May 2014 - 19:53Well I think my decision to scrap this cab was definitely the Wright choice, There wasen’t mutch holding the screen in,
admin
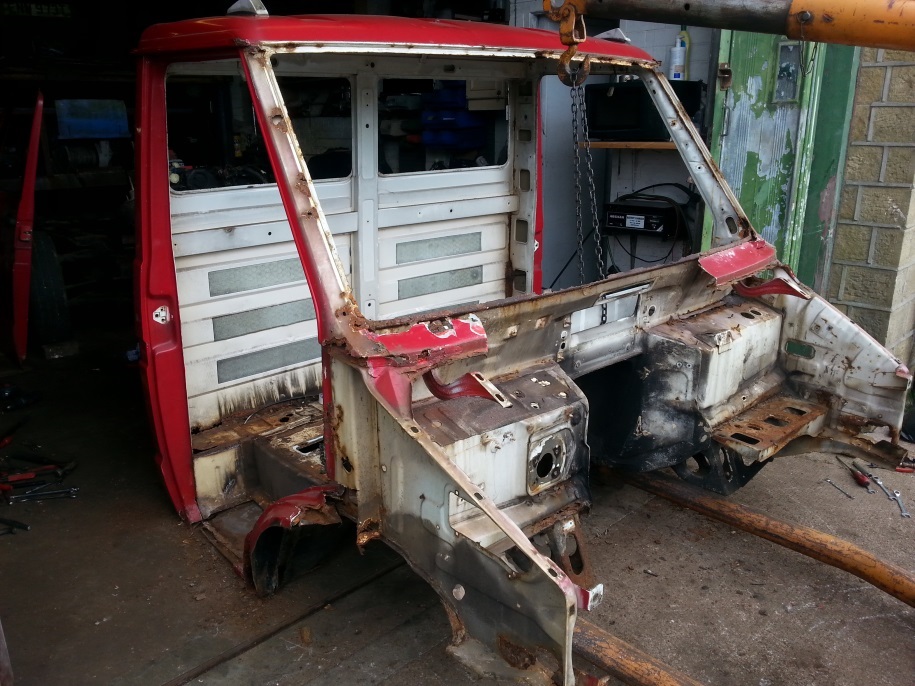
16 May 2014 - 18:26Found this cross member when the cab was removed, Looks like it is a bolt in piece ? Well I hope so any way will find out tomorrow, More welding,
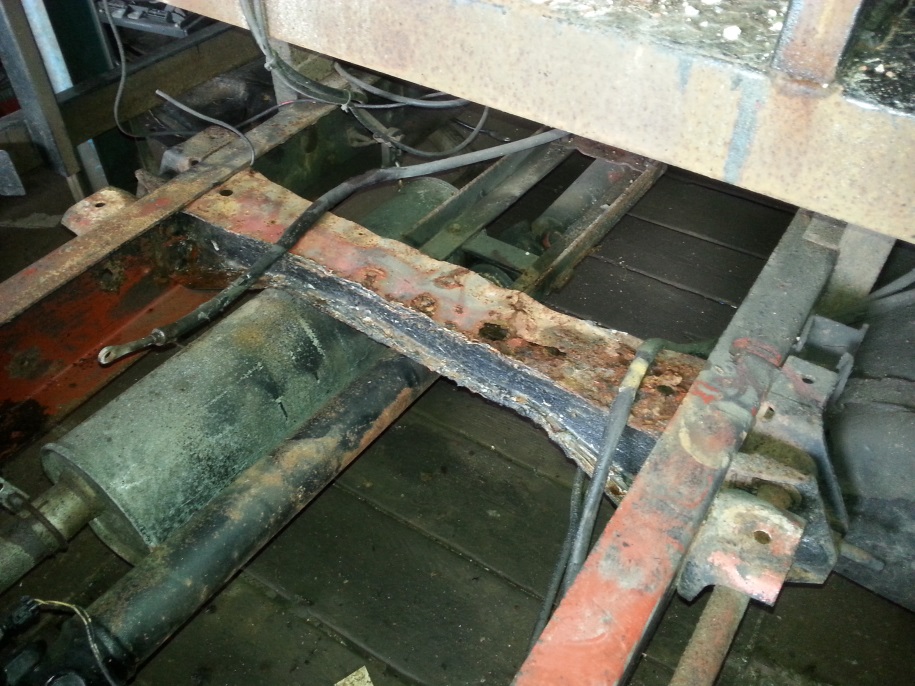
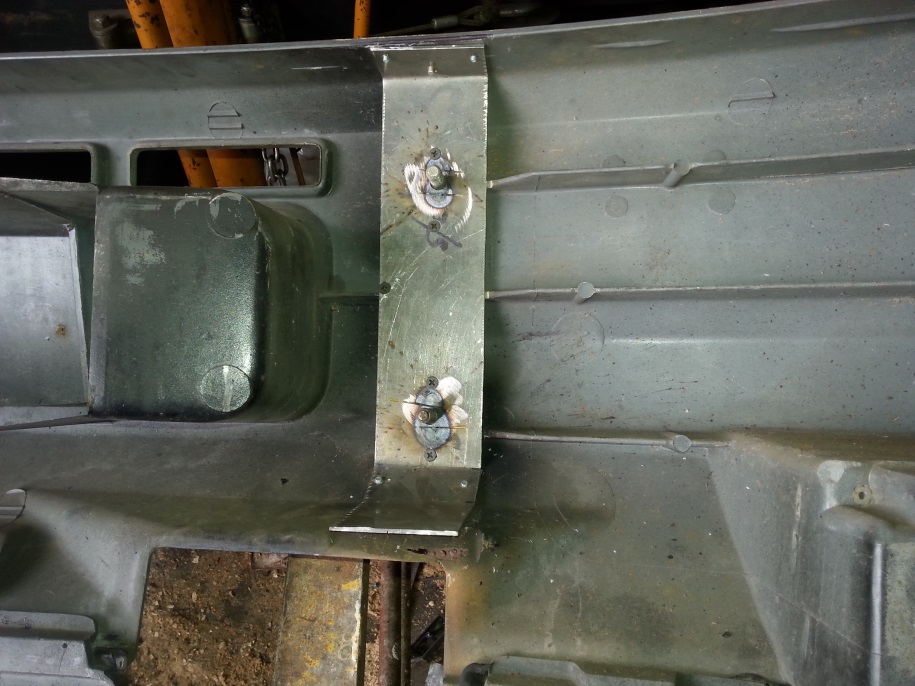
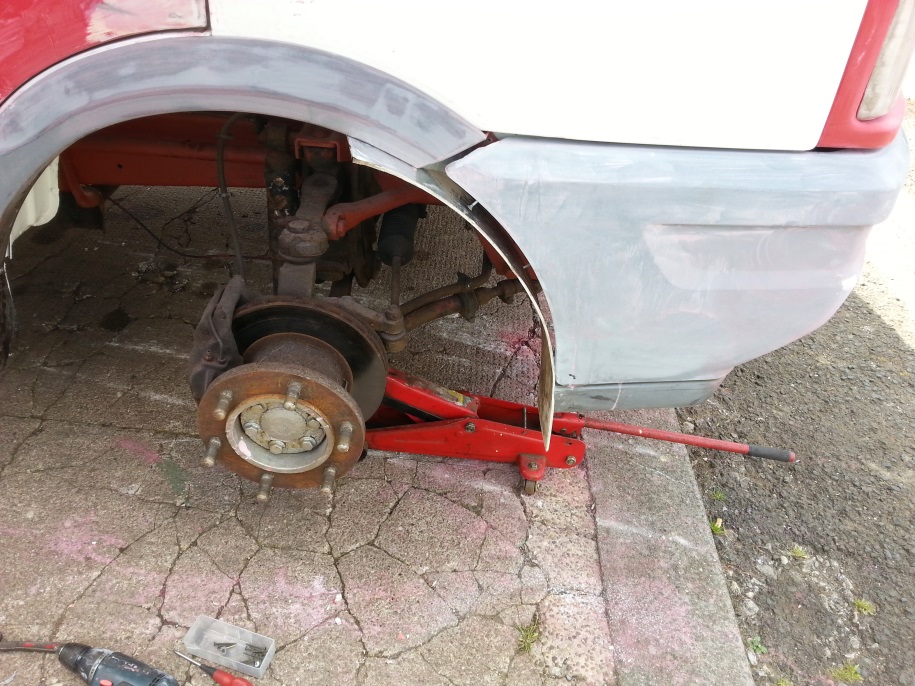
Pressure washed the front end, Found engine mount broken, and the bolts that fasten the cross member to the front of the engine 3 had stripped out all the threads had to drill and tap them to 12mm used some treaded rod to make studs, there was a botched up bracket on the right hand mounting bolt to the engine can just Above power steering pump in picture, I refitted it to give a little extra bracing :huh:
Engine mounts replaced,
admin
19 May 2014 - 20:22Managed to remove that rotten cross member, Had to drill out the rivets on the cross member to the rear of it and unbolt one side of the gear box cross member then jack the chassis rails apart about an inch
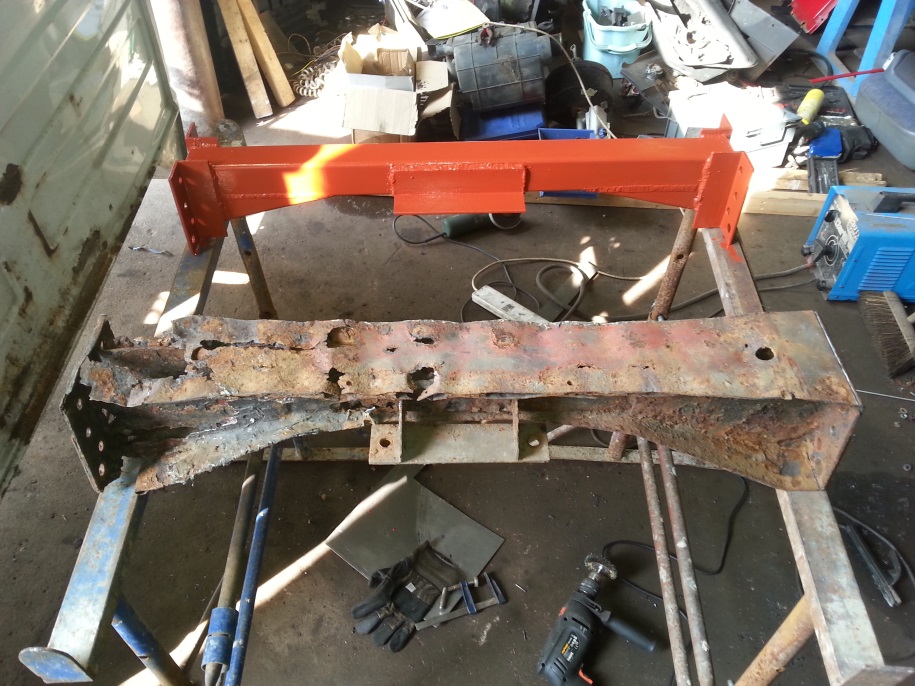
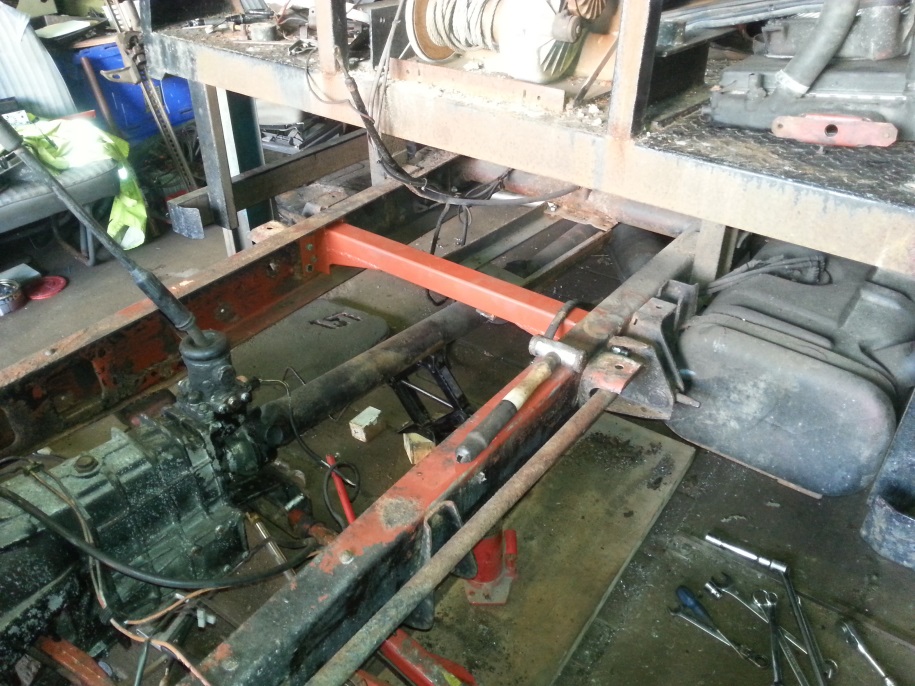
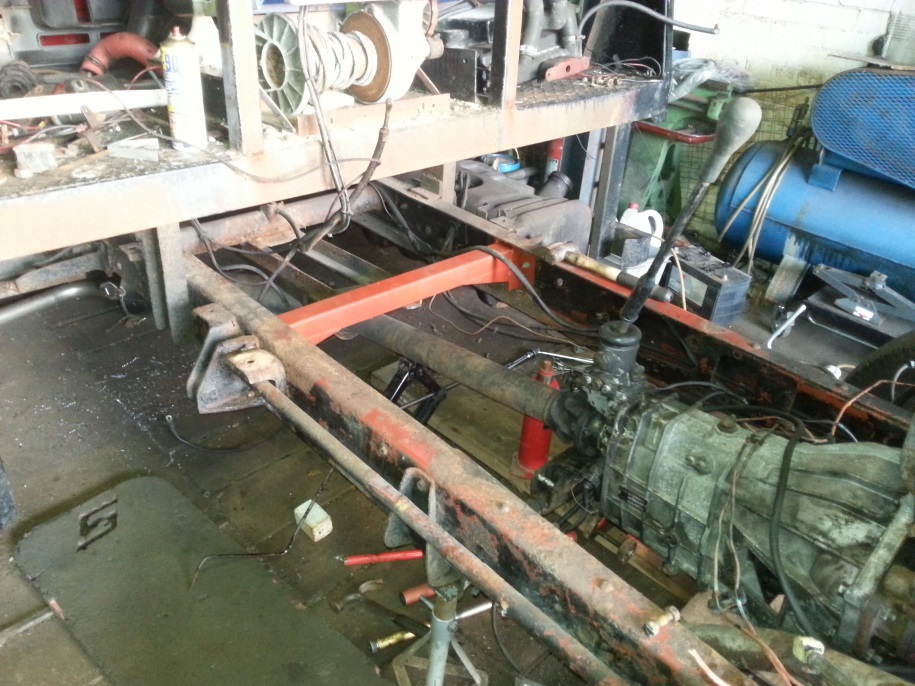
Made a new cross member and fitted it, Just got to mount the centre prop brackets tomorrow then it time to put the Cab back on AT LAST 😀
admin
20 May 2014 - 19:59A Big Thanks to my son Leon he worked till 9 on Sunday night soldering wires together removing lots of those unwanted plugs,
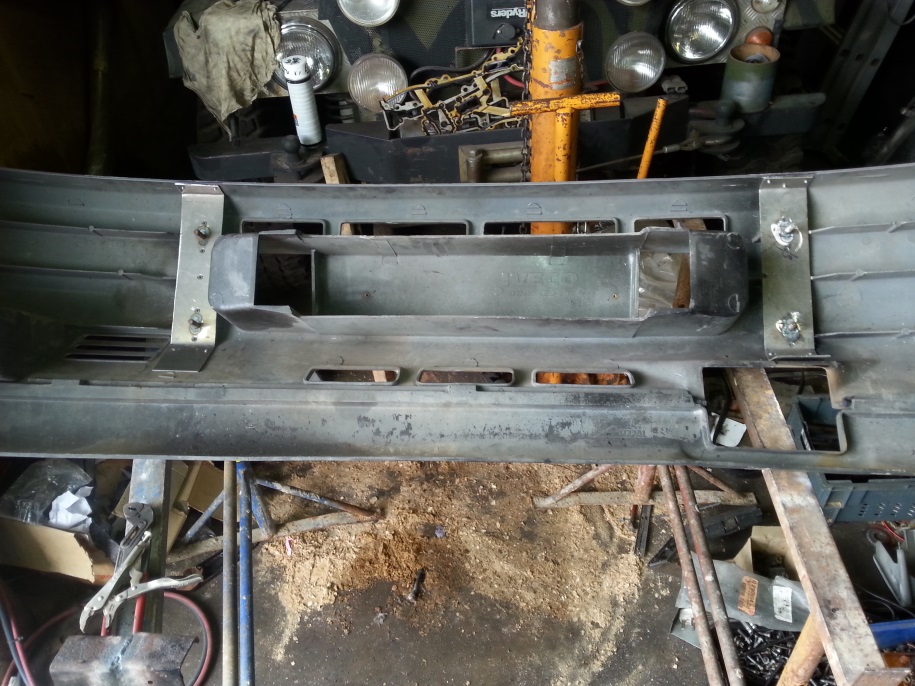
Thanks for scrap yards too, Got some bumper brackets the other day think mine have seen better days,
Managed to painted the back of the cab in British racing Green Metallic before dropping it onto the chassis :blink: Not happy with the paint very patchy, But will have to do :unsure:
Cab sat in place at last 😀 😀 I can start to build it back up soon be there,
admin
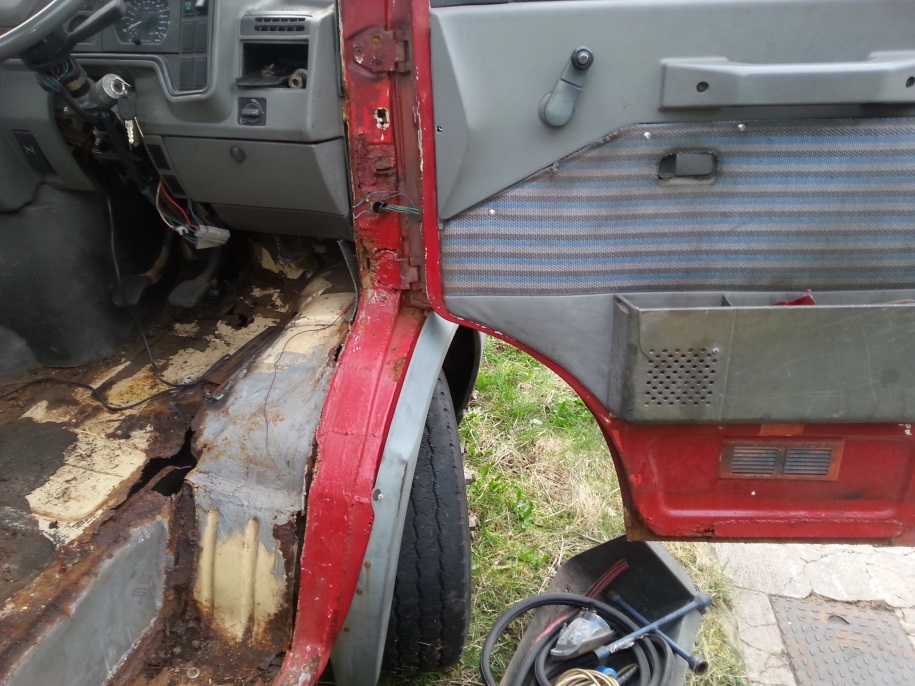
21 May 2014 - 21:46When I tryed to fit the clutch cable today I found the Bulkhead hole all cracked and needed welding burnt the new paint,
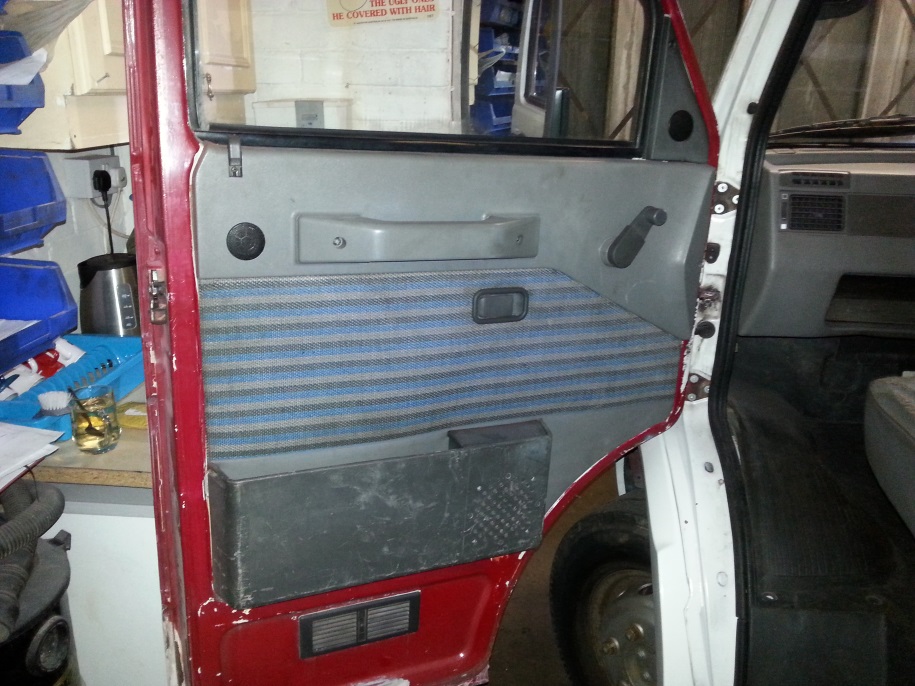
Repaired and fitted OK,Fitted windows front and rear, Pedal box and servo,
Fitted the handbreak, Gear lever gater and column and gater to find I had to remove them all to fit the rubber mat
admin
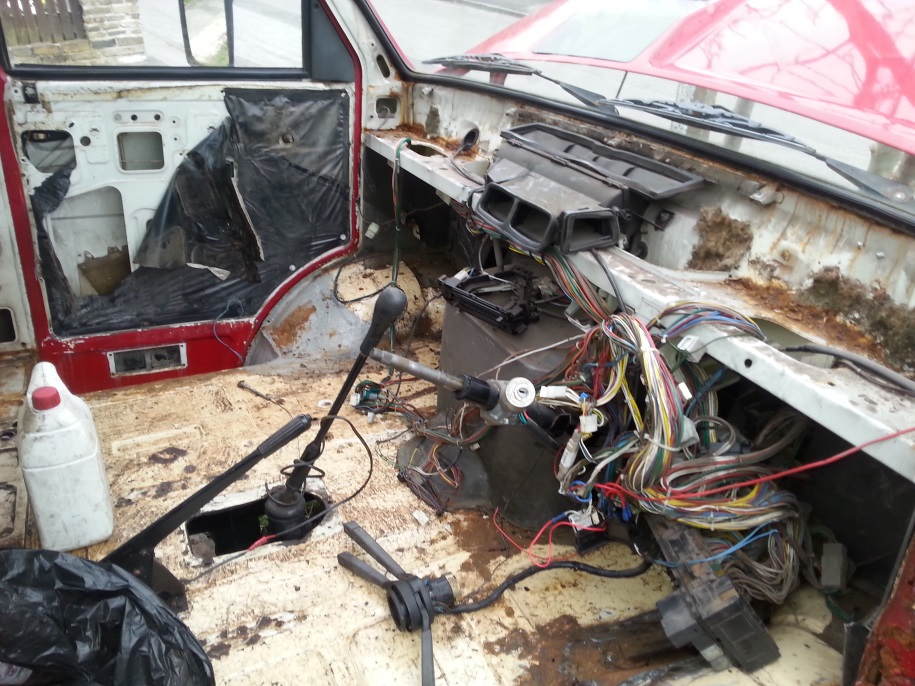
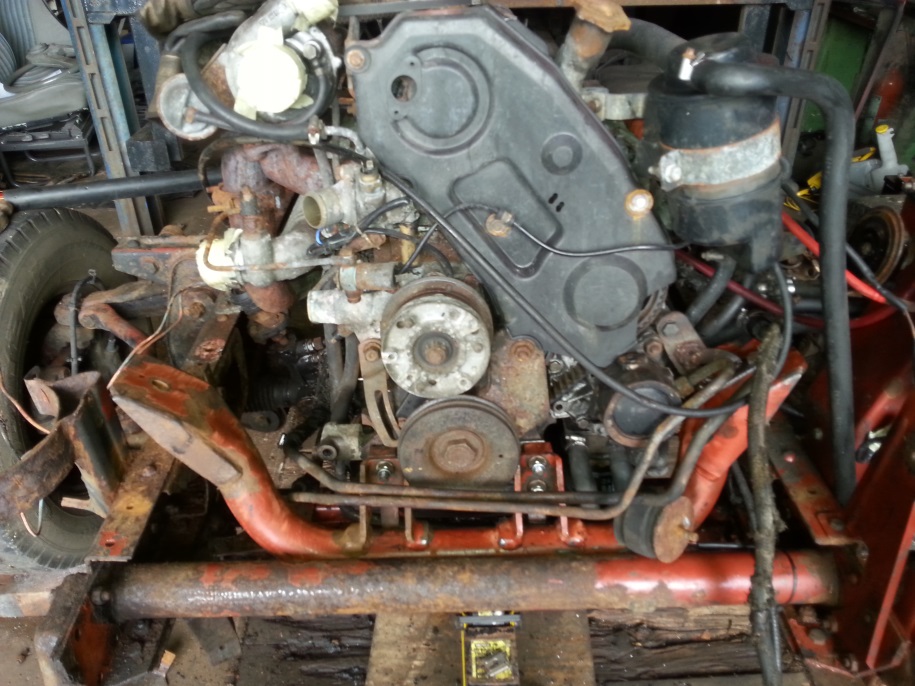
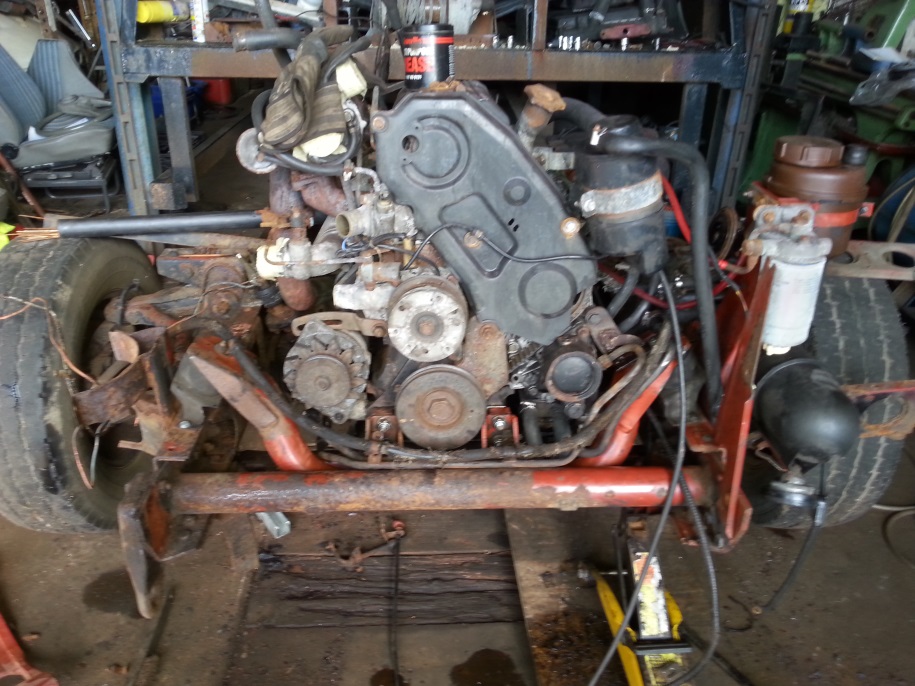
22 May 2014 - 20:54Got lots of bits done today Heater, Dash and most wiring behind dash, run wires up to roof for beacon, mounted various things under bonnet,


I will fit a new timing belt before the rad goes’ back on need to find a new 3 bolt fan blade or drill something out to make it fit!
admin
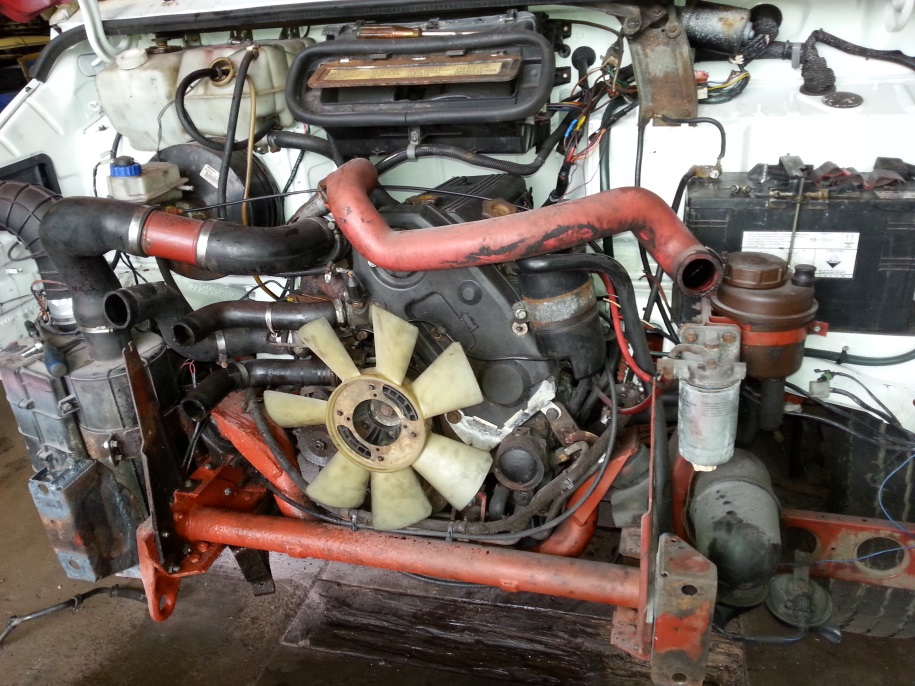
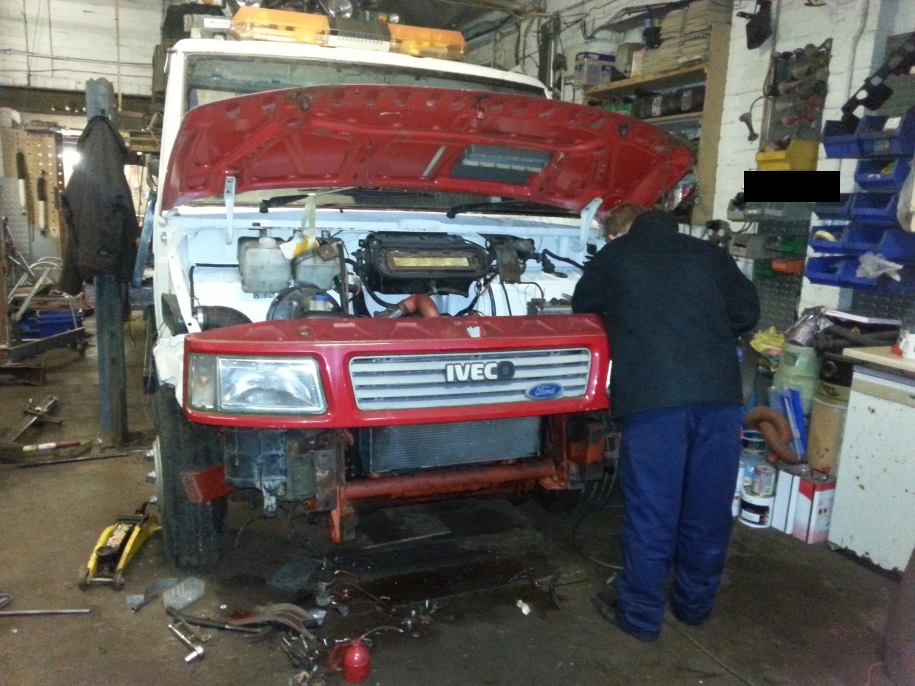
25 May 2014 - 22:11Had a couple of good days at it, New timing belt fitted belt cover had some gaps so patched them up, exhaust sorted, Oil cooler pipes and power steering pipes secured, Bumper brackets and Air box mounted, accelerator connected, Radiator and inter cooler mounted and connected, She starts and runs,

admin
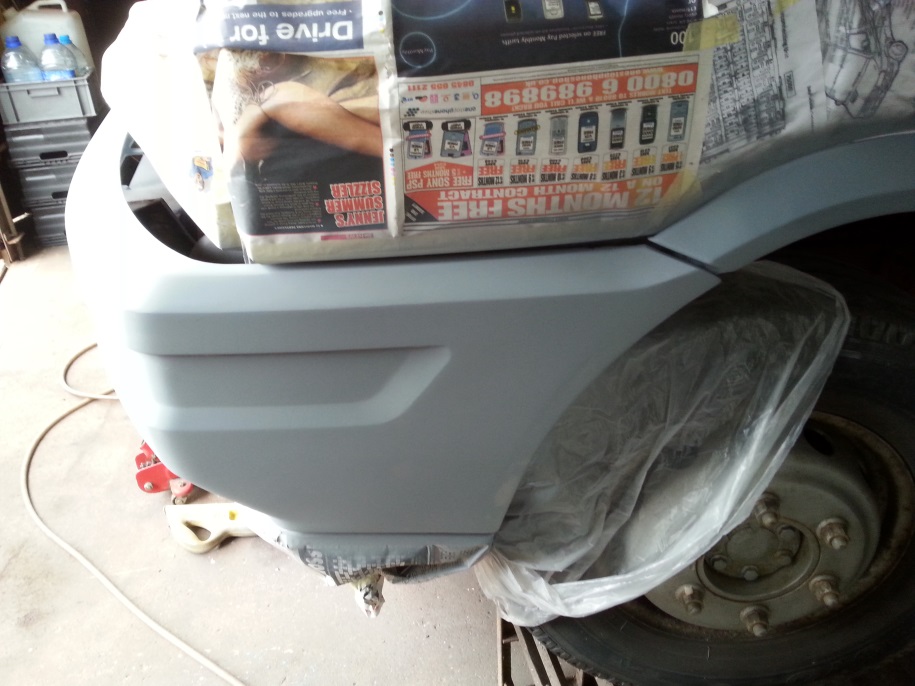
26 May 2014 - 21:29If anybody had said it would take all day to make and fit brackets to the fibre Bumper I wouldn’t have believed them! So the only progress today was repairing the bumper, and the 2 lower front panel mounting bolts, needs the bumper removing again and the brackets adjusting to raise the right hand side,
admin
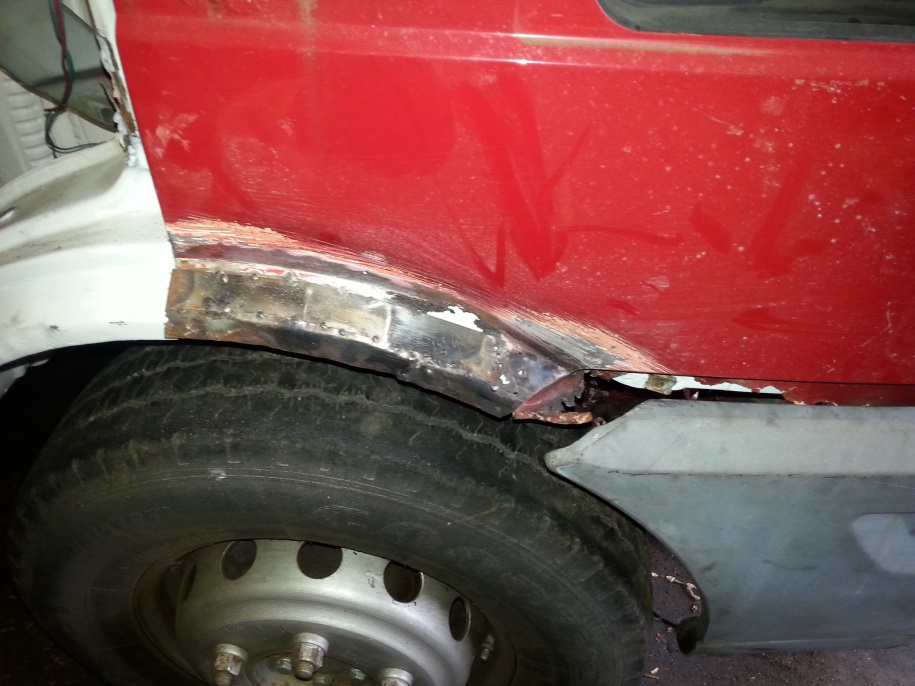
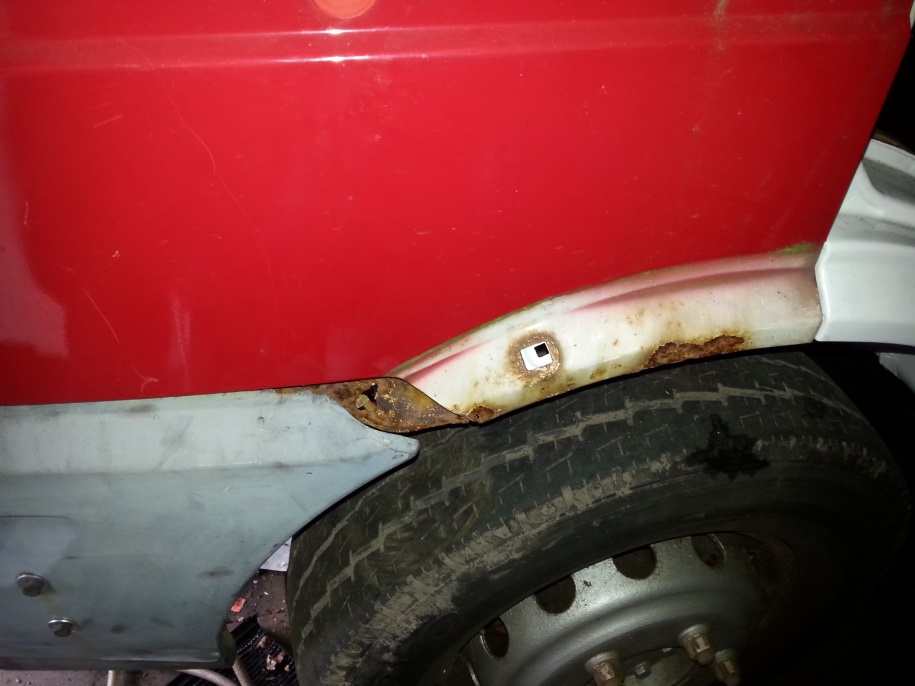
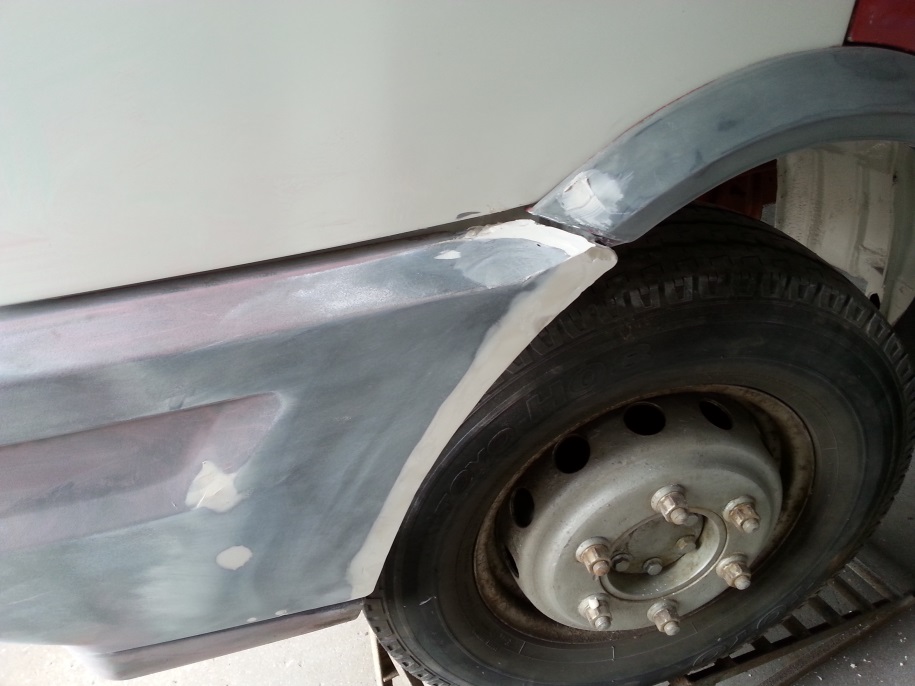
28 May 2014 - 19:28This is the scruffy patching someone did to the drivers side wing, Will post some after pictures below
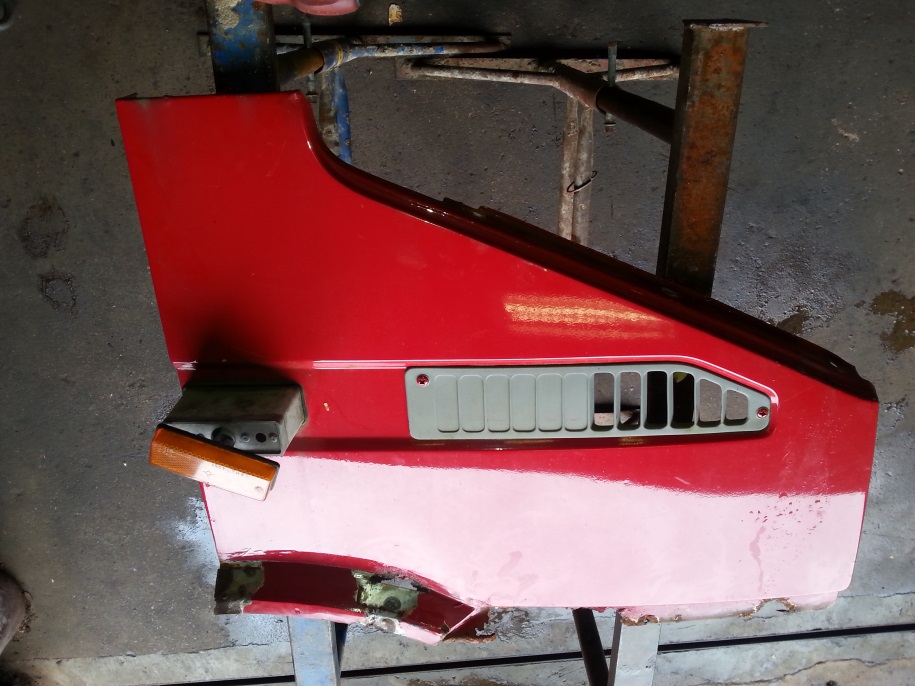

After
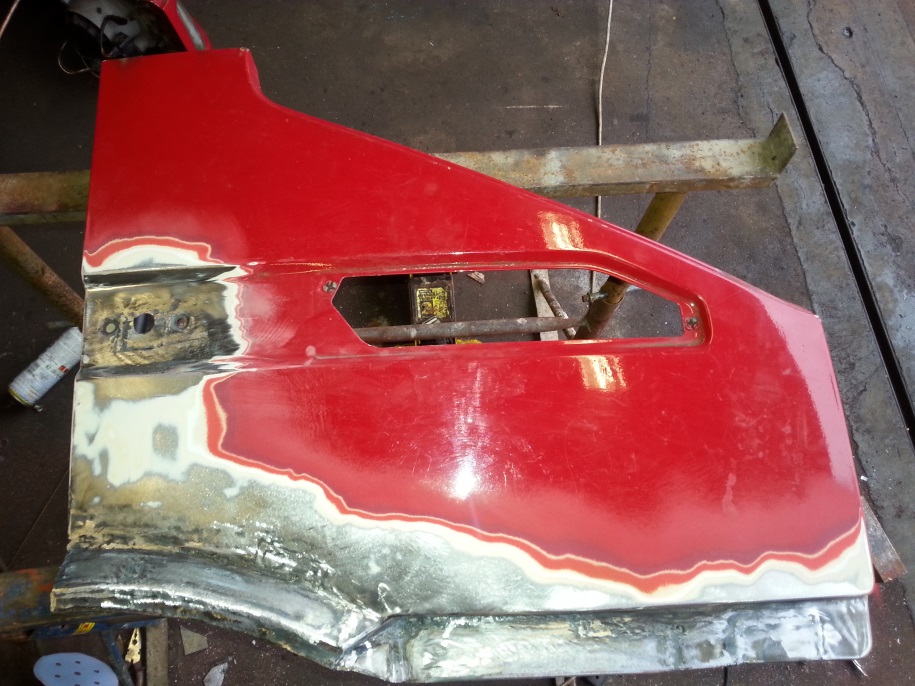
Cut out the corroded areas and the scruffy patching, Time to start again!
Patched up and ground off a little
Just a quick coat of primer to see how much panel beating I need to do? Looks pretty good so far,
Passenger side wing needs a little work on bottom edge, But other wise it’s not bad,
admin
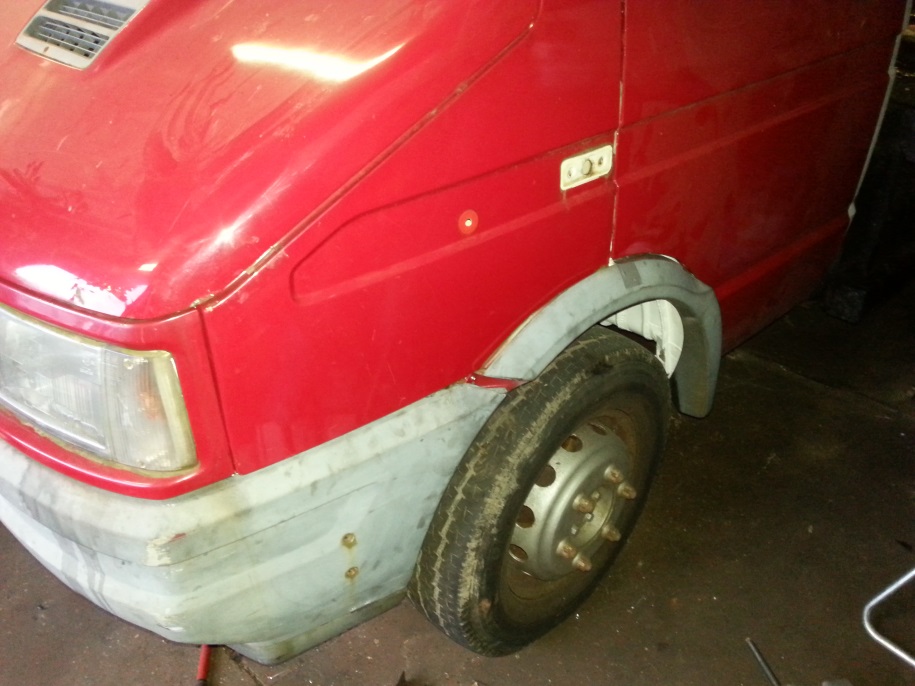
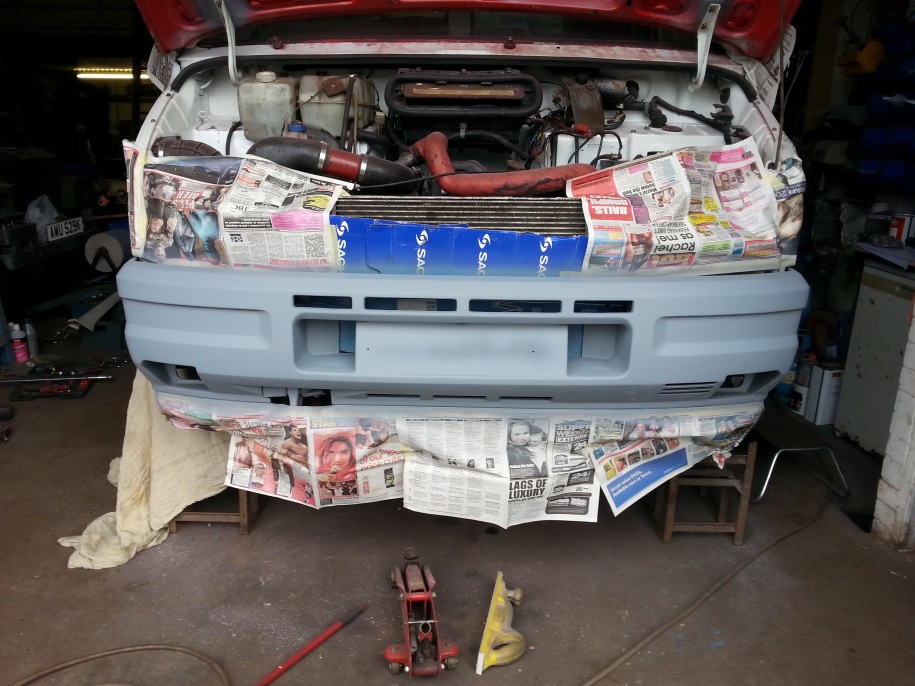
1 June 2014 - 22:02Well at last I got the bumper mounted, Just some reshaping of the arches and more wiring to finnish and 3 brake pipes and the drivers door,
admin
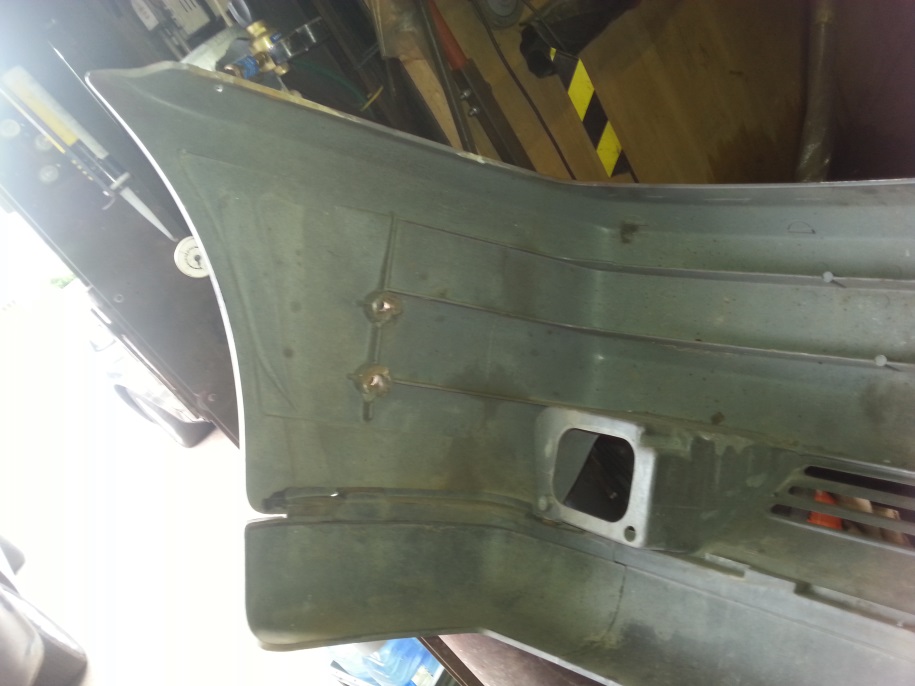
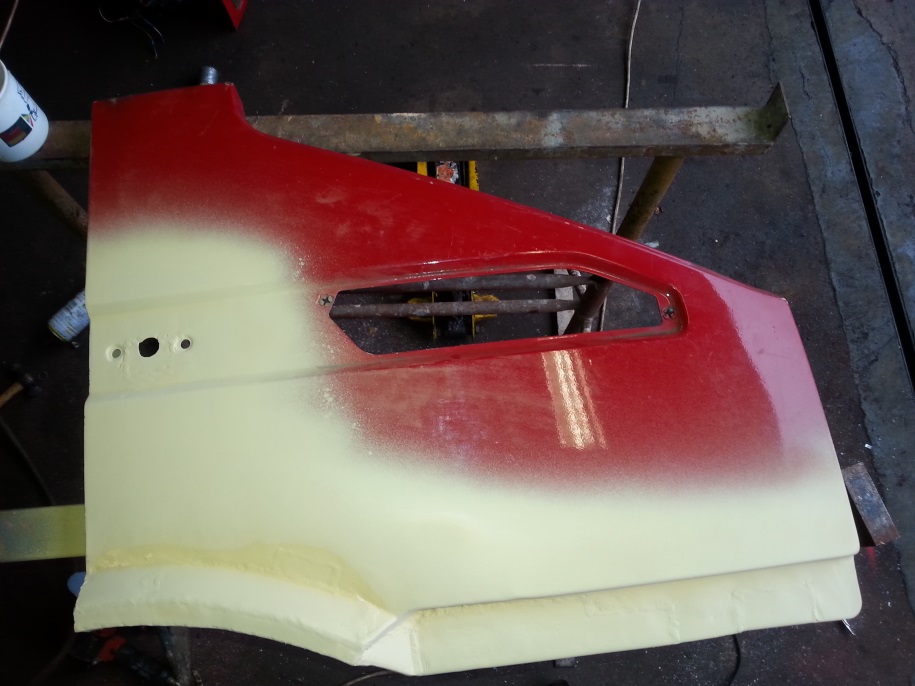
6 June 2014 - 18:44Got lots of little things completed, Wings painted (had some white left over so it’ll do for now keep it looking clean), Doors mounted and trimmed wheel arches adjusted, The doors are corroded and in a terrible state, but will have to do for the time being till I can find some good ones,

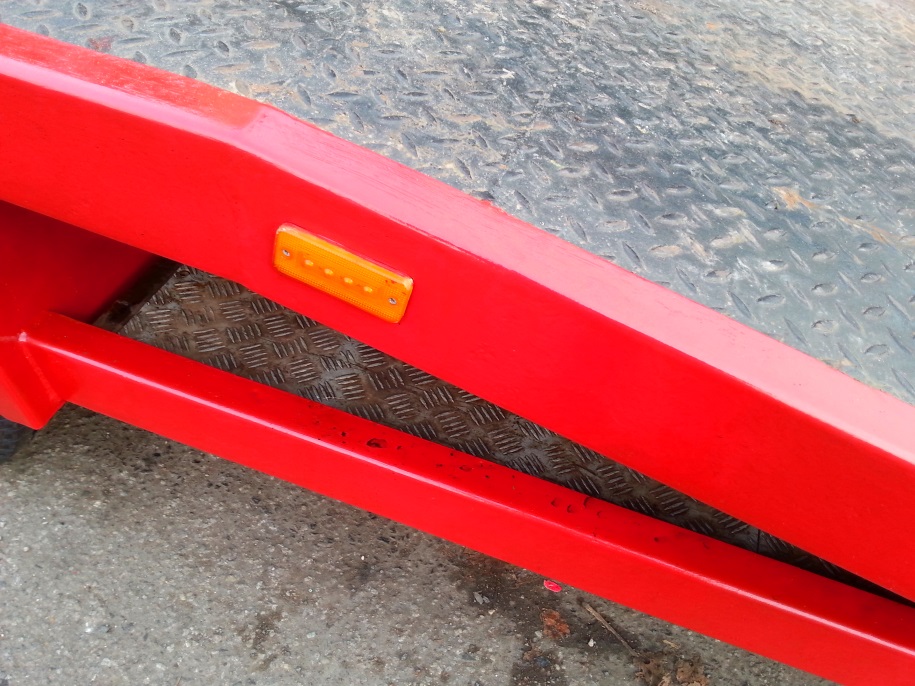
You can’t really see it here but I’ve sanded some of the bumper, Think I’ll colour code it and put yellow reflective in the recessed bits should look good with the British racing green,
admin
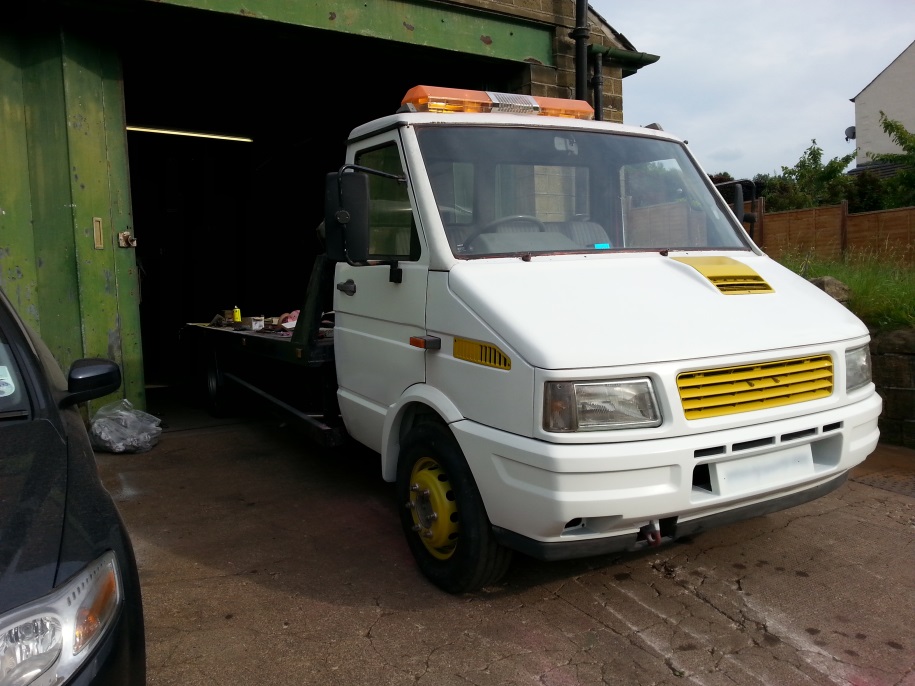
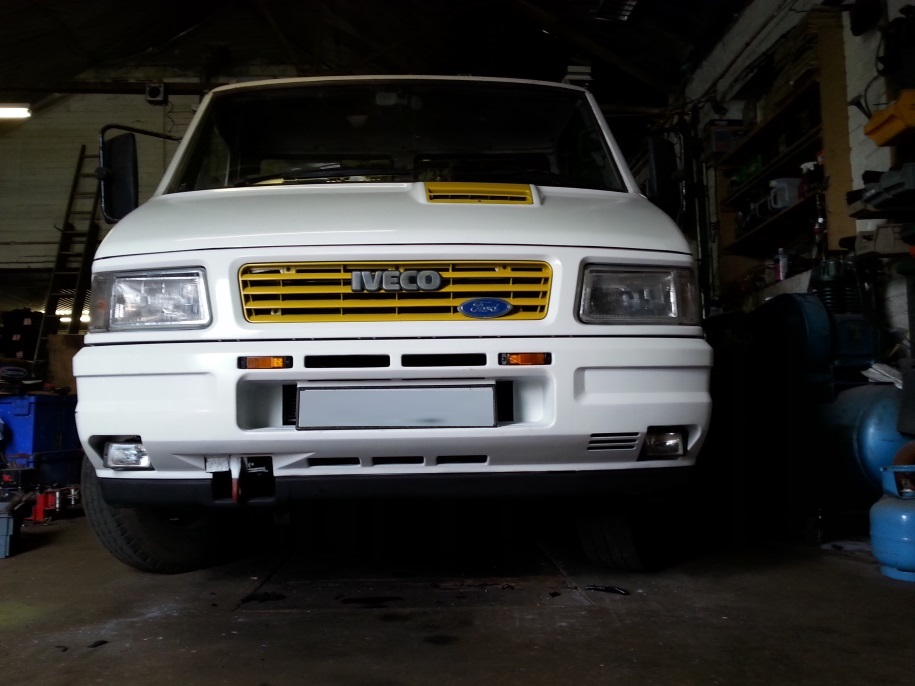
10 June 2014 - 19:40Well Well Well ! It vibrated it’s way out of the workshop today 😀 At last I can use my workshop again,


Who said an IVECO won’t fit in the back of a rover 25 the old cab cut up and off the fore court,
Couple of pictures of it outside
admin
18 June 2014 - 20:35Had to wait 2 days to get the rear brakes for the LDV in the back ground, So did a bit more on the Iveco, The rear lights were troublesome they opened outwards and the wiring kept getting damaged, So I’ve started over and reconfigured them to open inwards and rotate a bit for clearance,
Got to do the Number plate lights and I think I’m going to put some side markers on too
admin
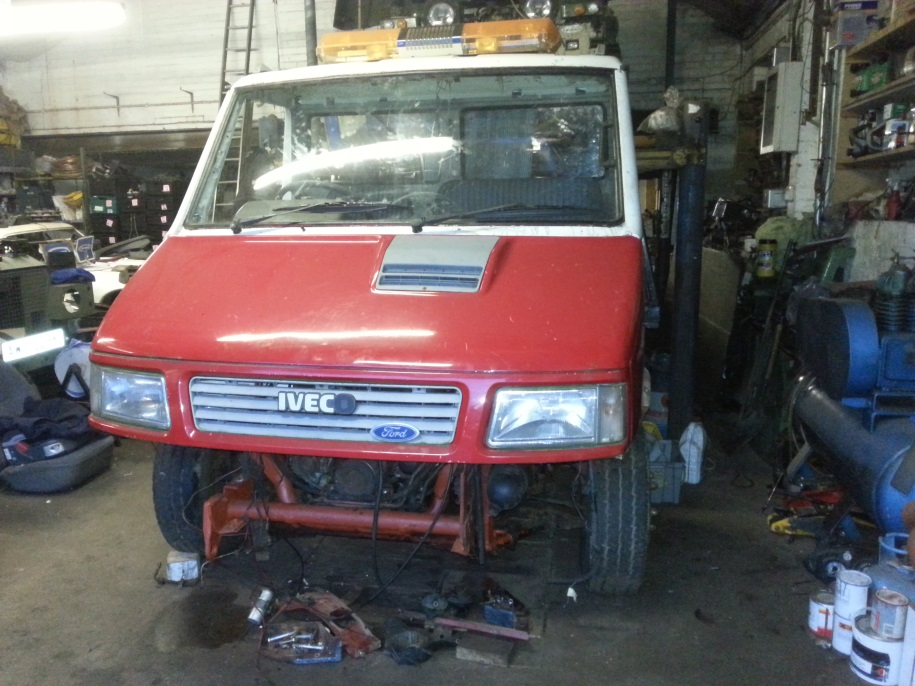
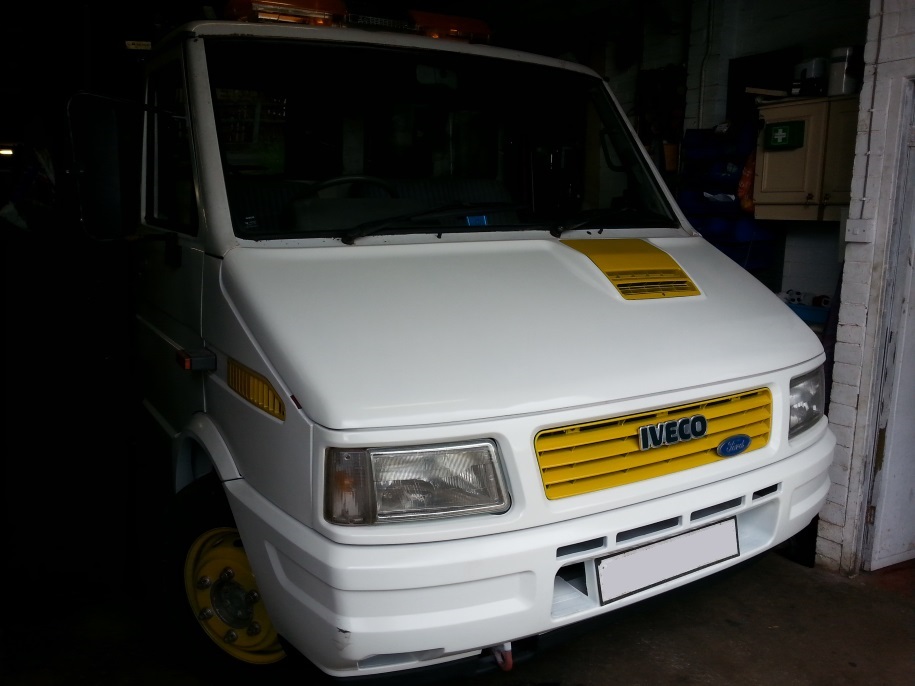
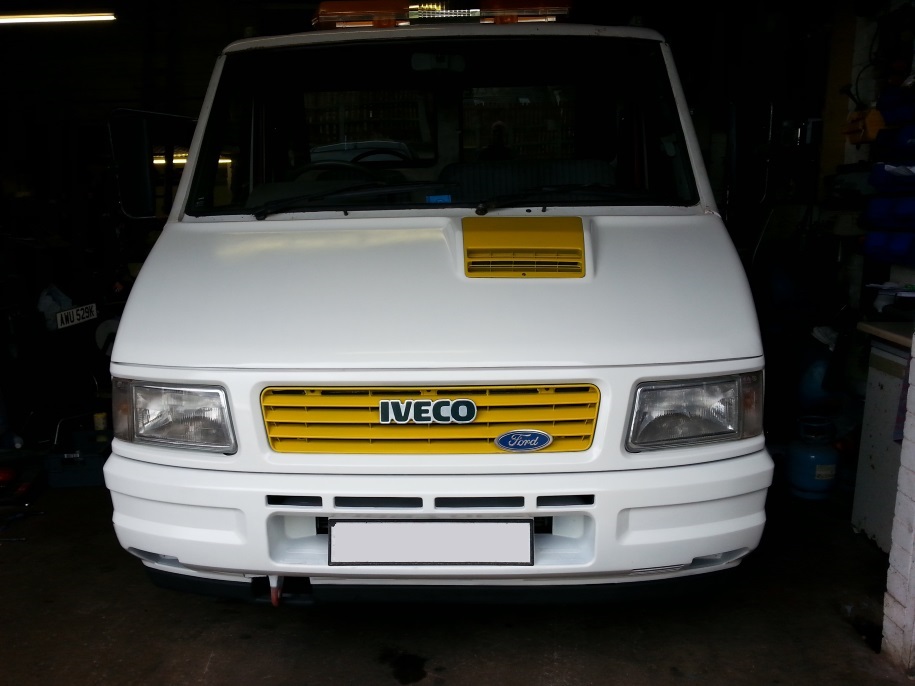
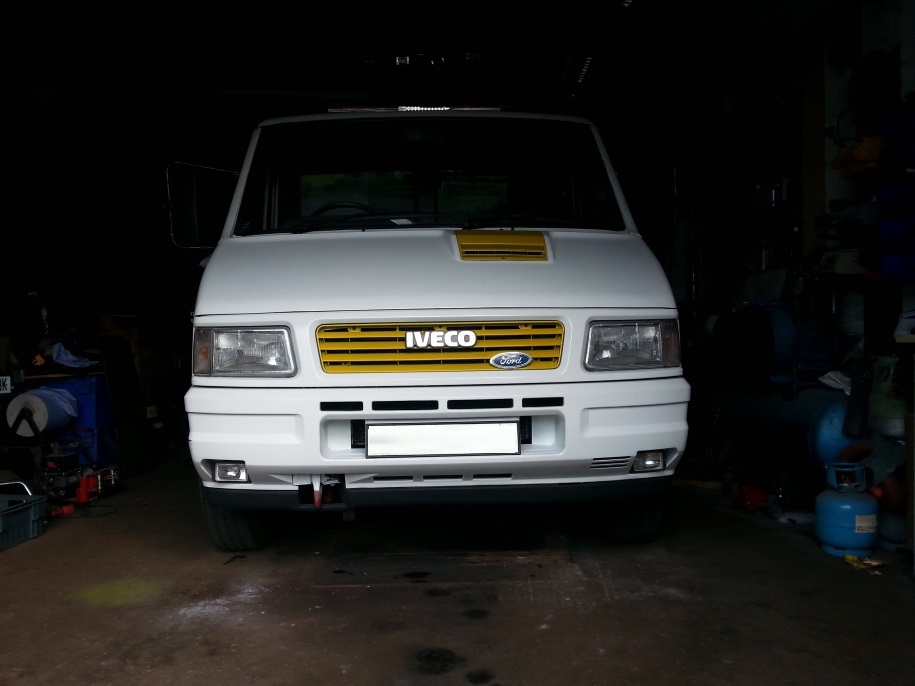
23 June 2014 - 20:37Had some time to spend on the IVECO again, Got some things sorted, Extended arches on bumper I use Duct tape as the fibber glass doesn’t stick to it, painted bonnet 🙂 and test painted a wheel in yellow,


admin
25 June 2014 - 17:37Bumper in primer ready for painting 😮 Should have a White truck tomorrow
admin
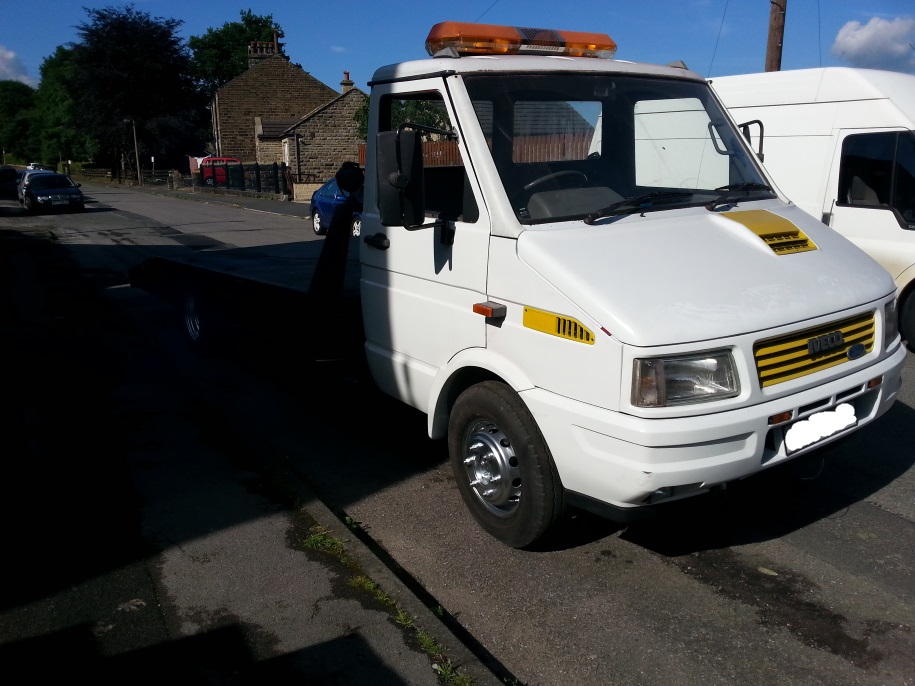
26 June 2014 - 19:22Had a good day things went like clock work so now I have a white and Yellow Truck YES yes yes I know the yellow looks crap with white but the truck will be British racing green metallic When I manage to find a couple of doors with the correct mirror mounting points,
admin
27 June 2014 - 16:18Just had to have a play with the new TOY, every thing work as it should

Need to make a lockable cubby under drivers side body of the straps and things,
admin
1 July 2014 - 05:34Getting my son’s M Tech BMW on the back showed that the ramps are steep’ had to coble up some wooden extensions to get enough clearance, Still better to find out at the workshop than at the road side, so now got to find storage for them too,
admin
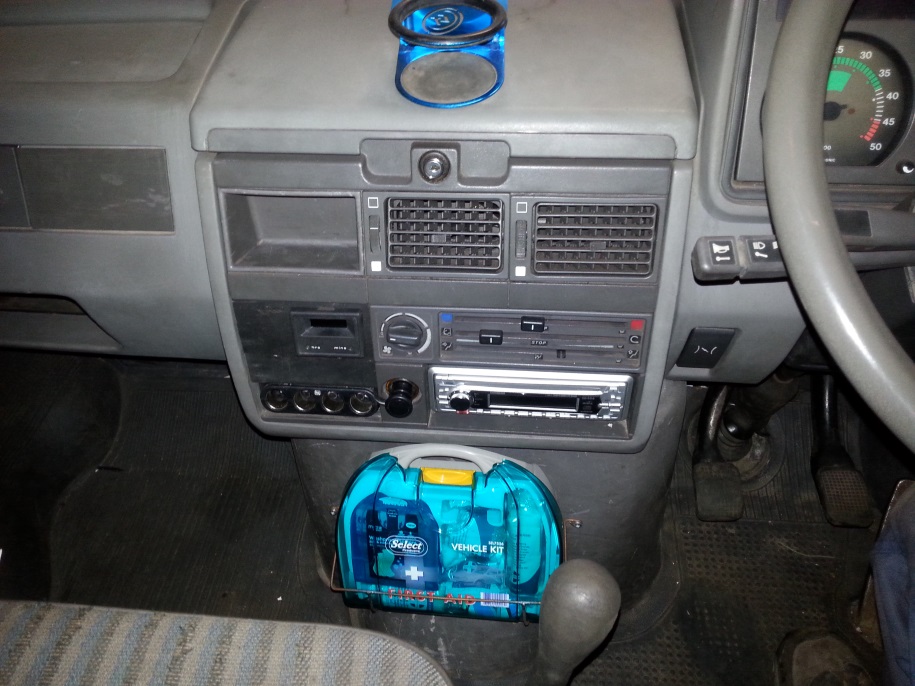
2 July 2014 - 17:53Couple of more bits fitted “First Aid Kit and fire extinguisher” made some blanks for the holes in dash and fitted some power out lets,
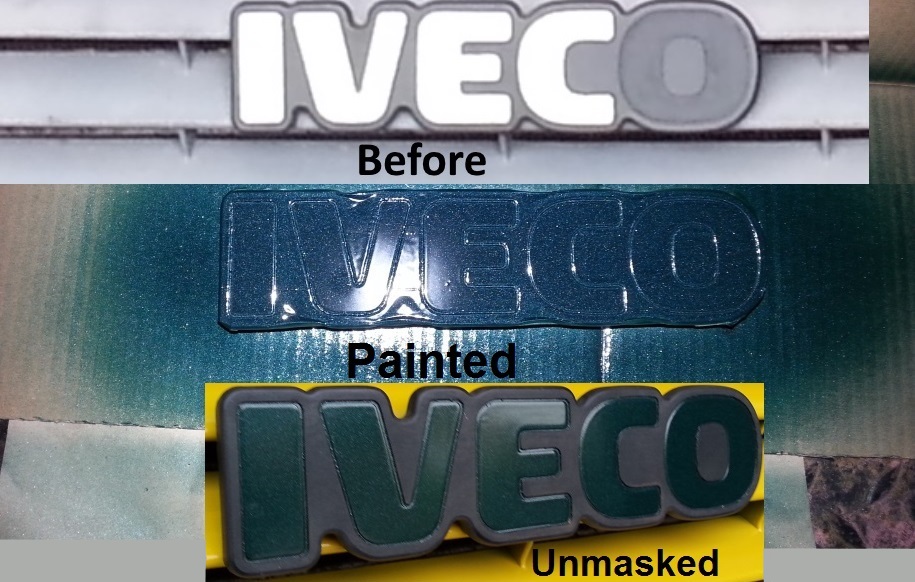
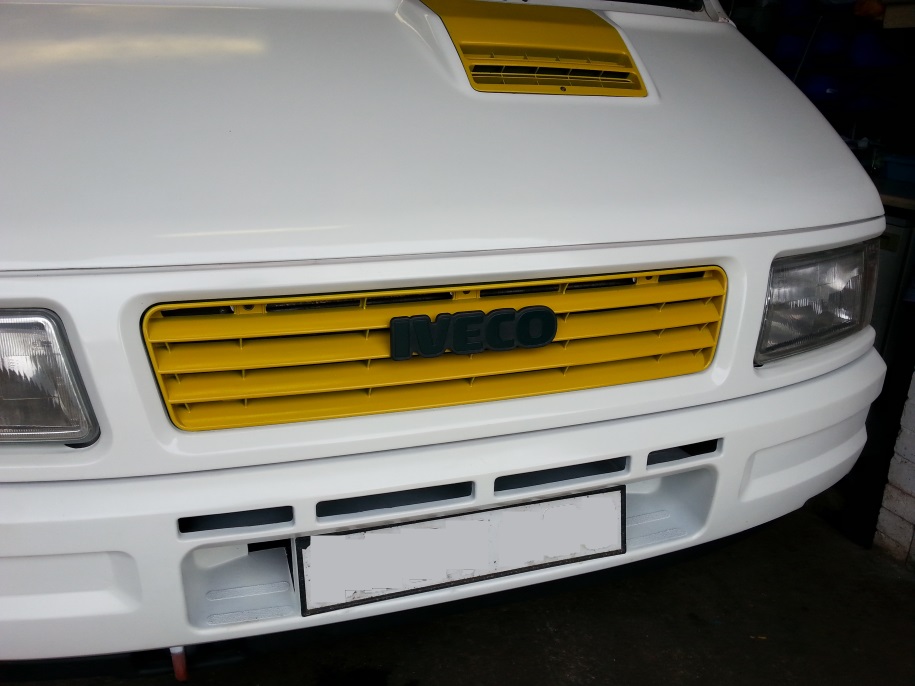
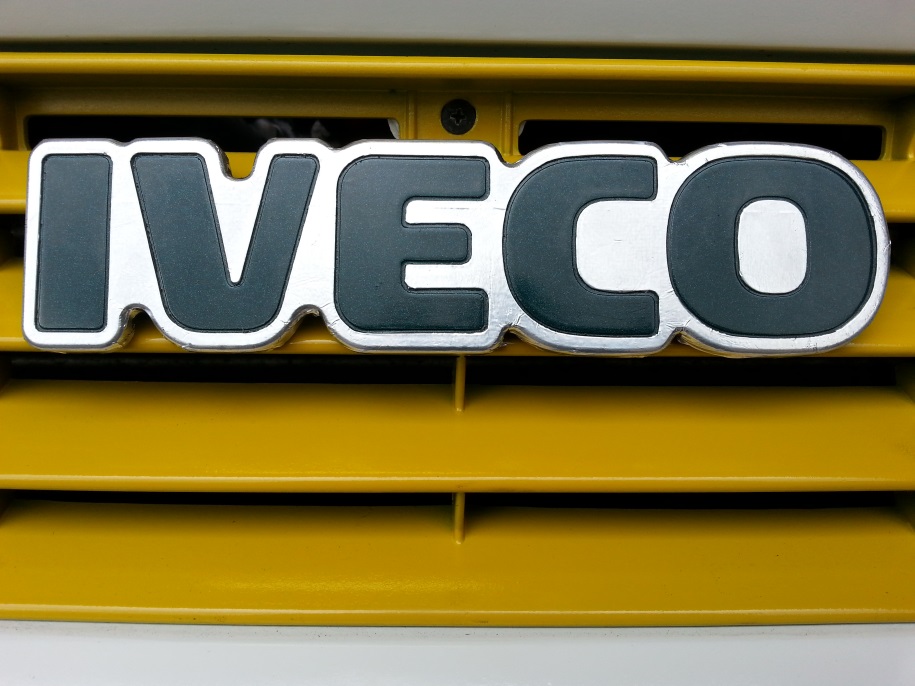
Not been able to get another front badge so wondering what this will look like with the masking removed !
Well removed the masking and the black back ground is too close in colour to the letters don’t show from straight on,
So did a little salvage work and stuck some ducting tape on it, cool LOL
admin
2 July 2014 - 17:53Had some people saying leave it White it looks good and a customer said why not have red wheels, So had a little play with paint.net here’s the images,


Hum I like some of them but the company colour is green and yellow
admin
7 July 2014 - 17:54Thanks to a generous member of The IVECO forum Petecl I now have a Tacho and some freebies, Opening that box was like Christmas all over, 😮 I’m sure you said you had posted it before I mentioned about the front badge, and a window regulator, WoW You must be a mind reader ” bet that was a fast 1 seconds worth There not much in my head” Thanks again pete you a super star,
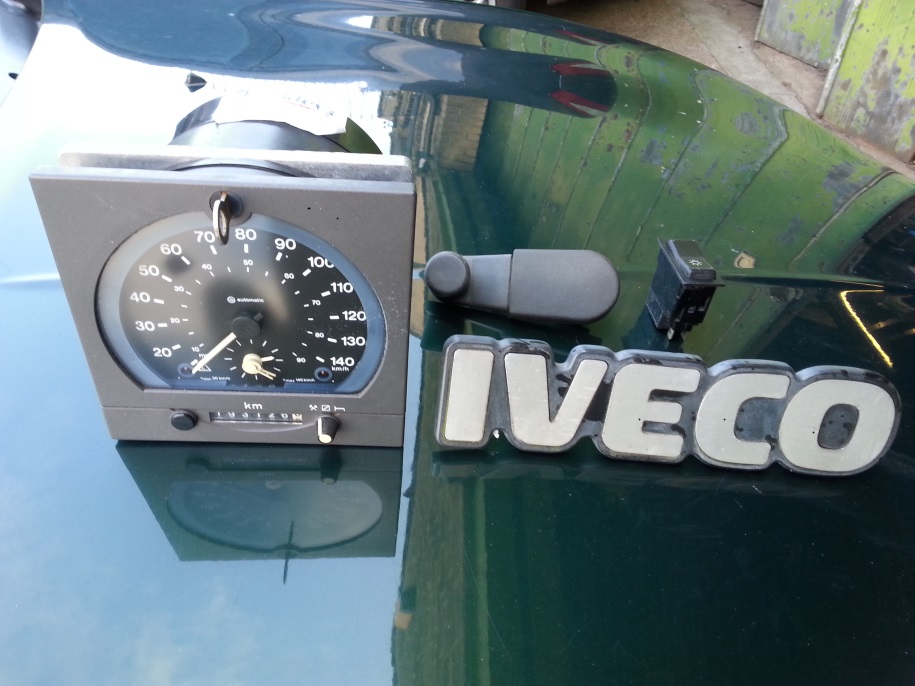
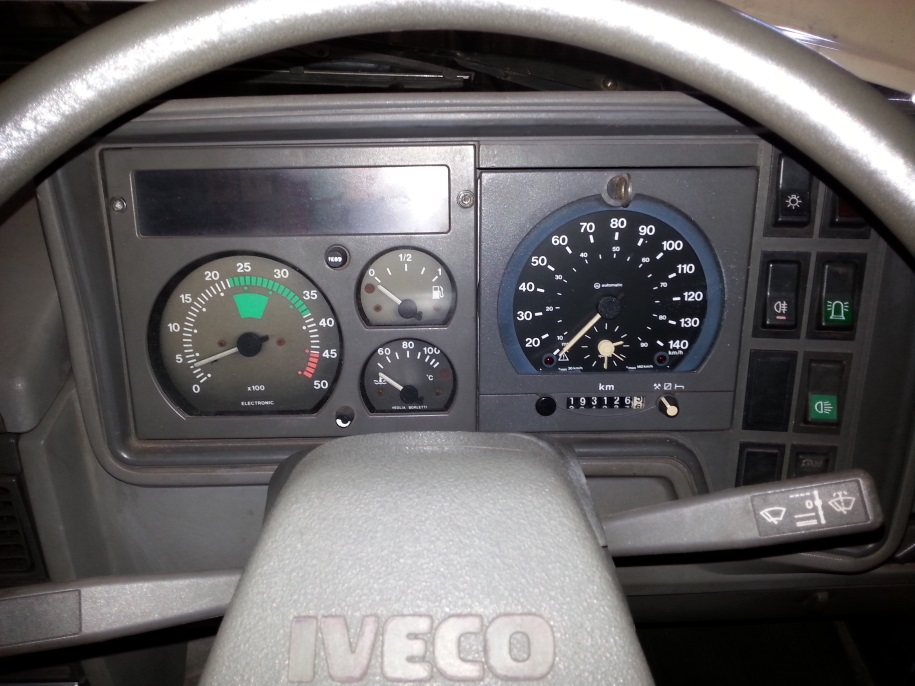
PS the milage on this Tacho is spot on Well mine is Mh an this is Kh so clocked a bit LOL
And the Window regulator, My son put me a 6 speaker system in from that old Vauxhall Zafira that can be seen in the back ground in some pictures
New Tacho fitted Didn’t like the little clock in the Tacho so Fitted a new one neer heater controls,
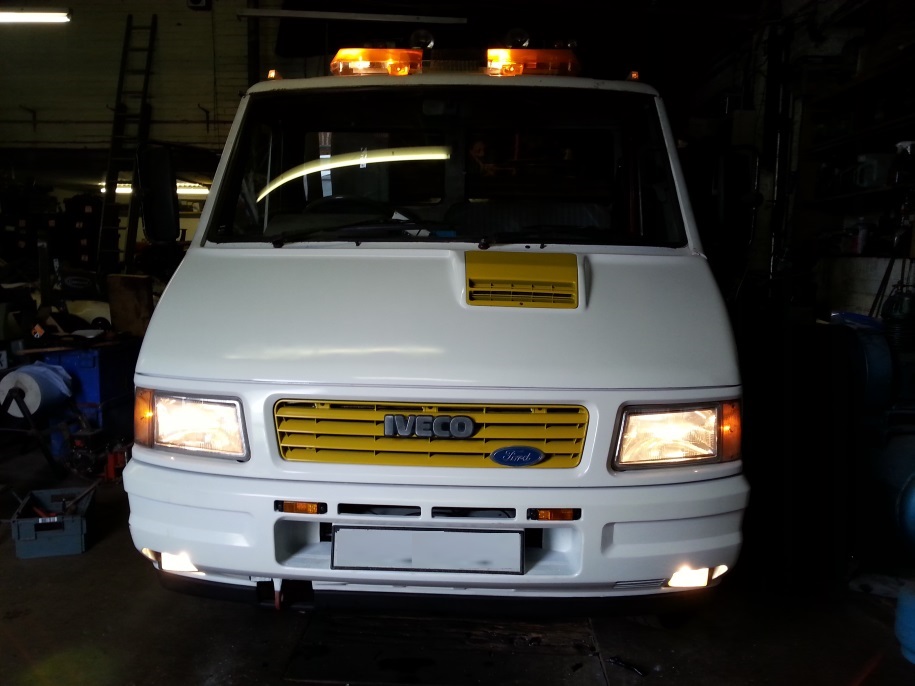
Managed to figure out the spot light wiring, Fitted a new switch & relay and some old spots I had,
Also fitted a buzzer to the winch switch so I don’t forget to turn it OFF
Is it a truck or a Christmas tree LOL
admin
14 July 2014 - 17:31Truck is ready now for the Tacho Calibrating and sealing, then it can be MOTed 😀
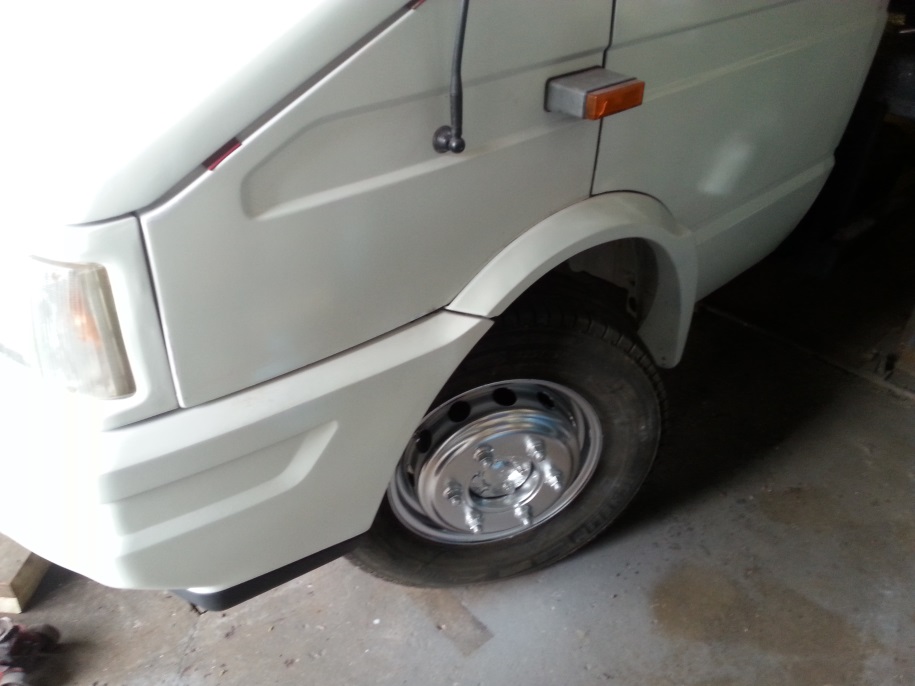
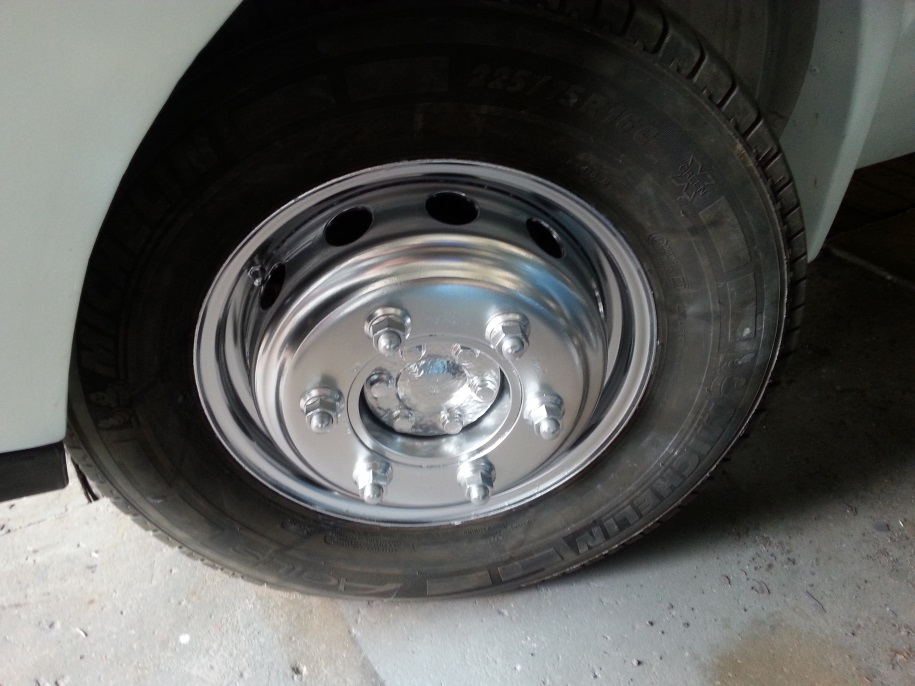
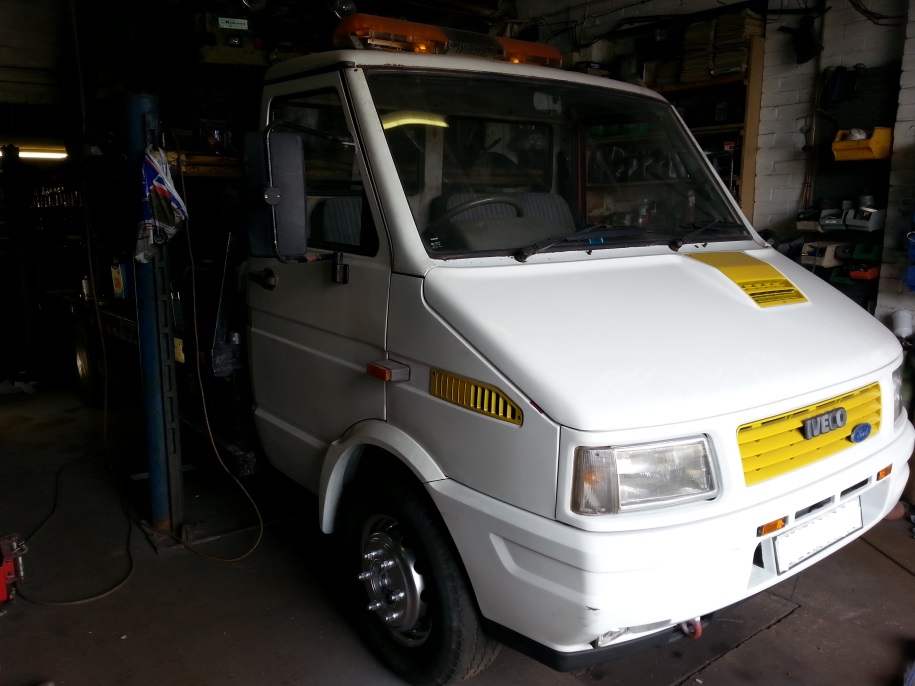
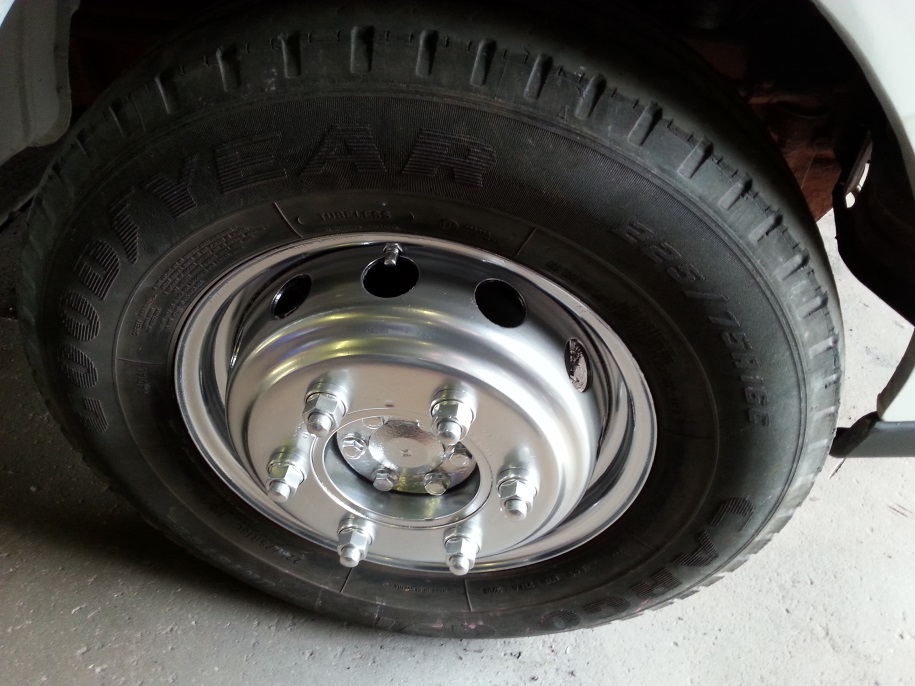

Did some work on my sons BMW wheel at the weekend painted it in some lovely Chrome paint and wow it looked fantastic until I sprayed some clear lacquer then all the chrome shine disappeared, a big disappointment, So waist not want not as they say, the truck wheels now look shiny wonder how long it’ll stay that way ?
admin
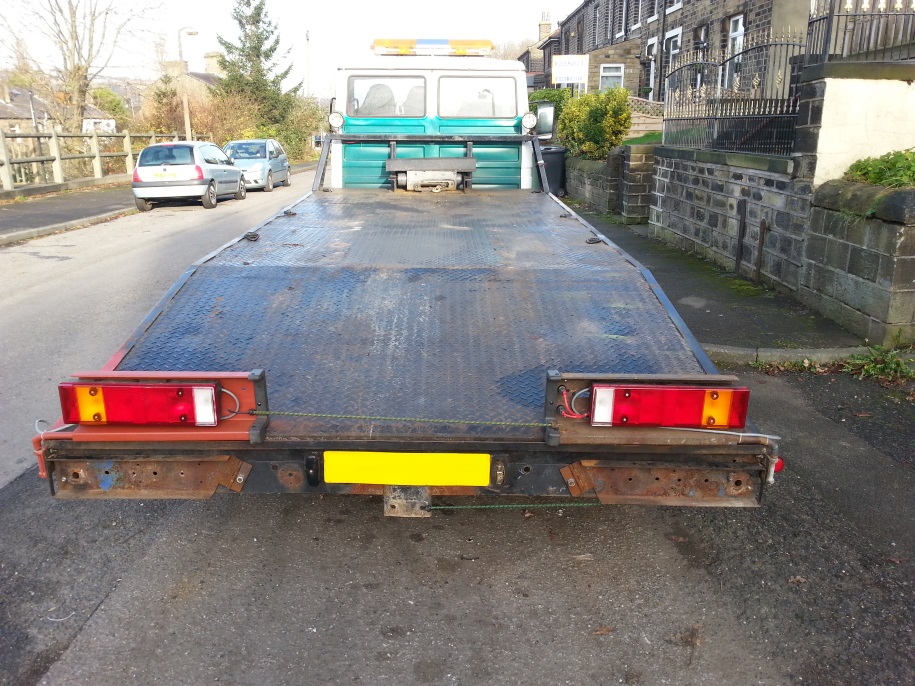
25 November 2014 - 20:19Little update on truck
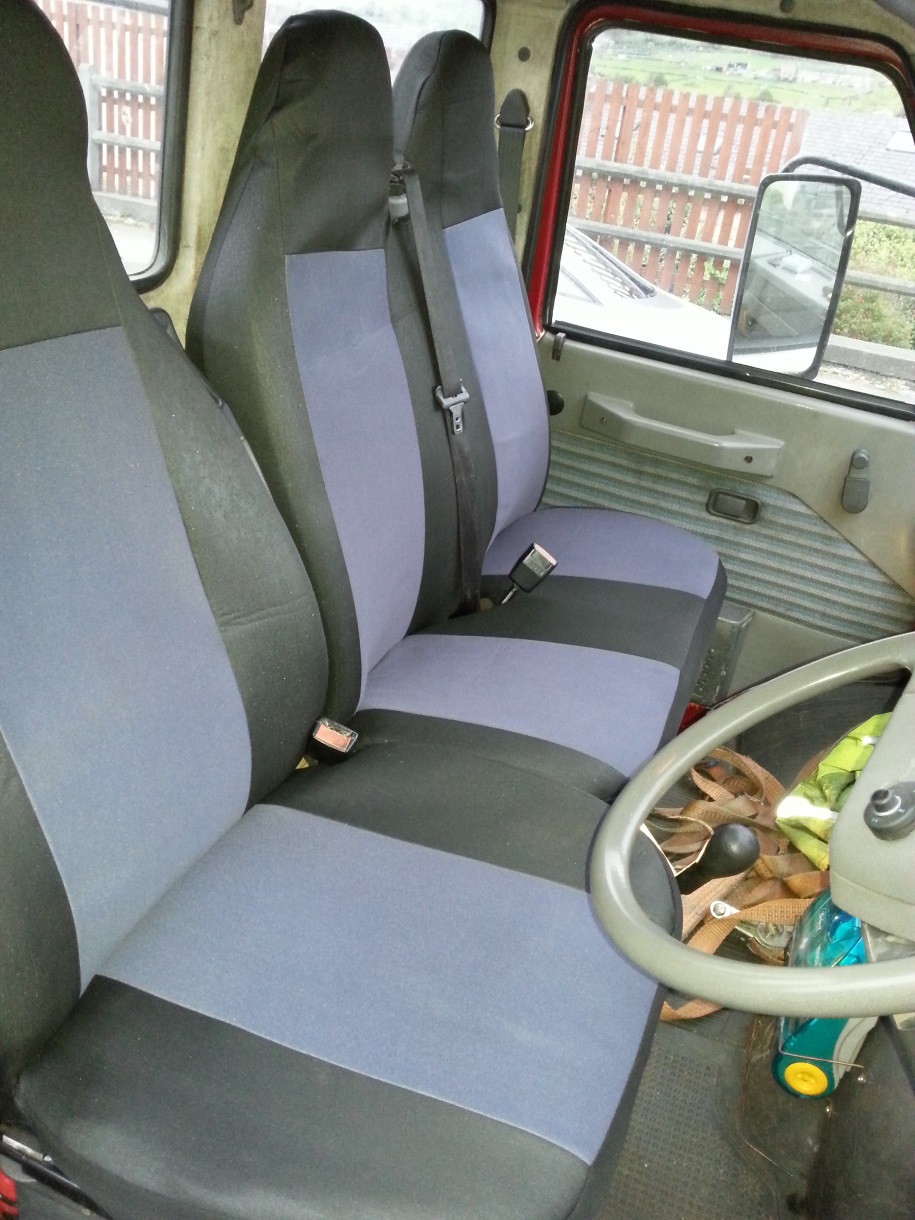
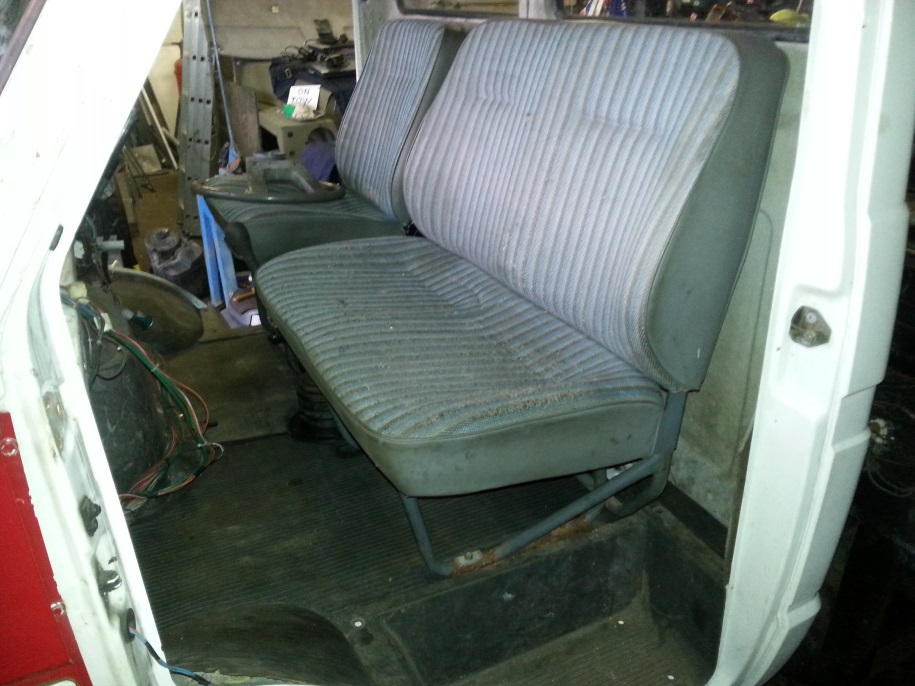
Fitted some transit seats, didn’t like the centre seat having a lap strap, So now it’s got proper seat belts and some cheep covers off eBay the drivers seat has both arm rests so comfy too
Also fitted some lockers to cover diesel tank and some were to store all the straps so there not on the cab floor any more
Were I live in Huddersfield it’s hilly and I’ve broken the rear lights 7 times so I’m reworking the rear lights and giving my self some safety space too, Fitted a new winch that sits lower the old one still works but was too high,
Next is to make some new ramps as lots of modern cars are so low I’m have trouble loading some a new shape Renault Espase was to low to load!!!
admin
5 December 2014 - 19:23Managed to get a little paint on this morning before I had to go out on a recovery with wet paint
admin
8 December 2014 - 18:35Cleaned the rear end and got some paint on, Just need to cut that tow bar off,
Started to mount a tow board on the rear loop to hang on the back of any thing that over hangs,
admin
10 December 2014 - 07:53Little more under coat on and it’s still light today,
Finished the light board mounting and lock